Drum Kit BuilderStep-by-step guide

Drum Kit Builder · version 0.10.0

Everything it does, step by step

Draw your drum kit from above at real sizes, see it from the audience and the throne, set every height and angle, hear it, and share it as a file or a picture. Here's every feature, in the order you'll use them.
BrowserAndroidWindowsNo accountWorks offline
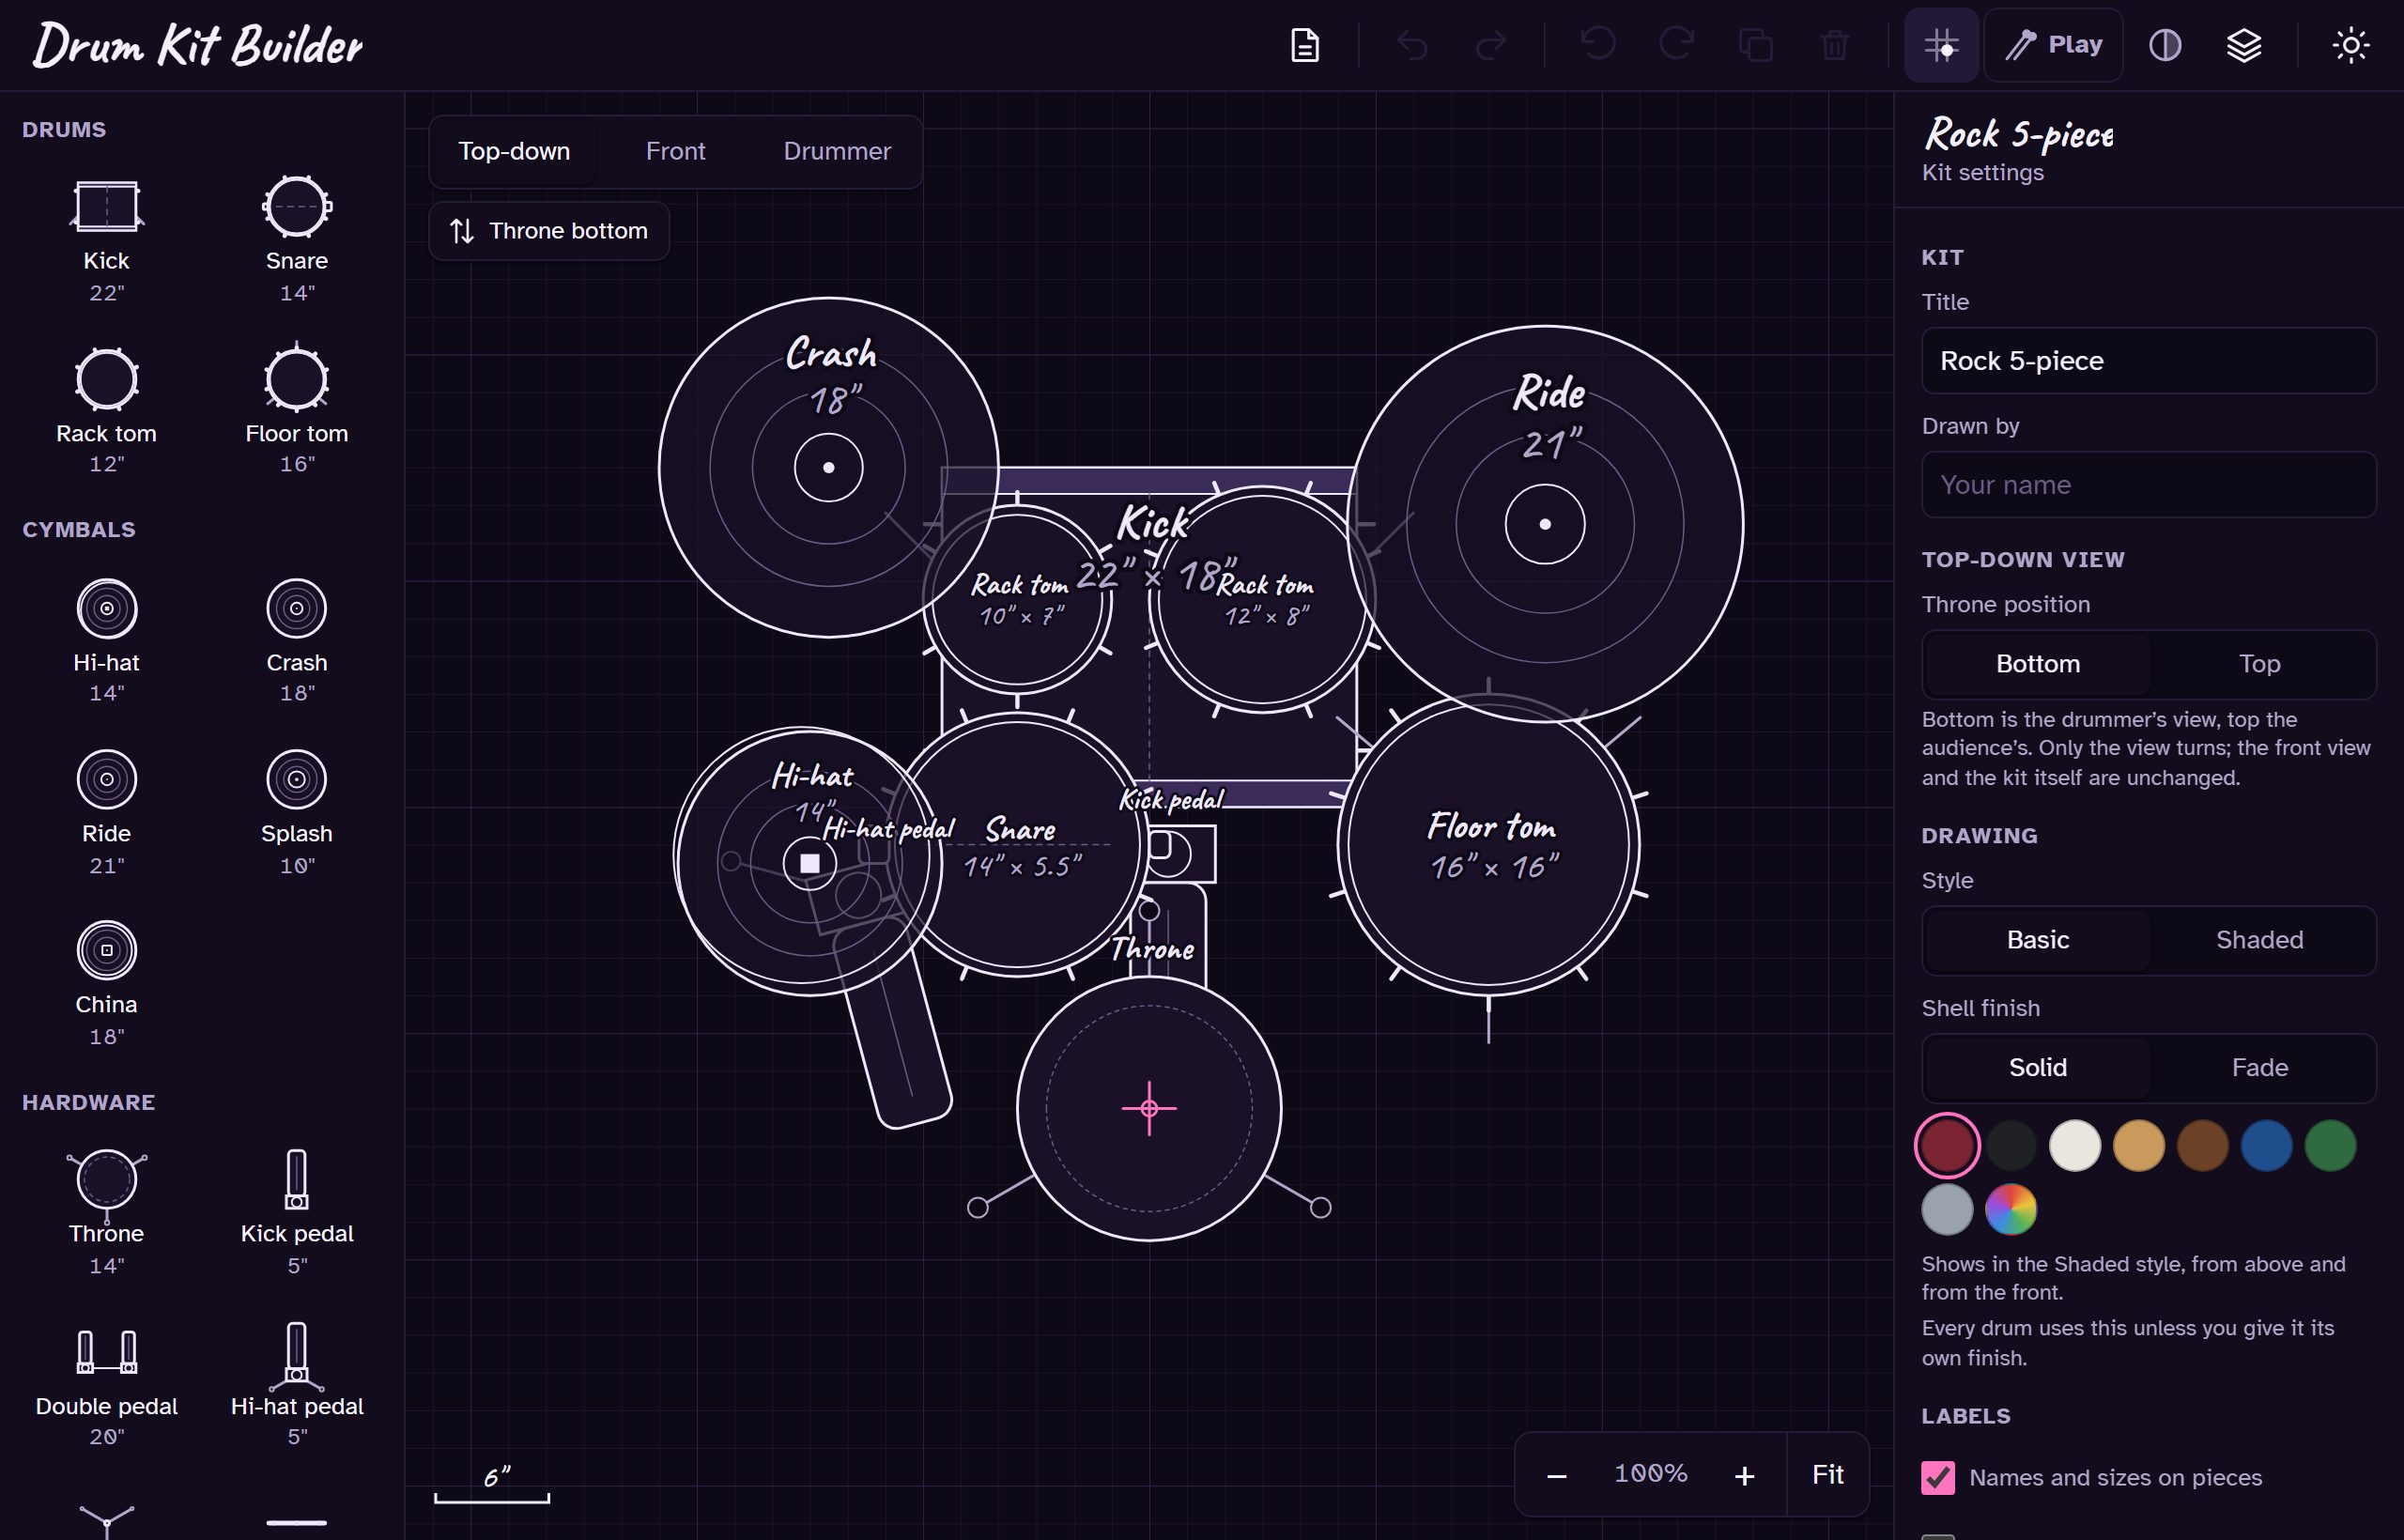
Drum Kit Builder with a rock 5-piece kit drawn from above, the pieces palette on the left and the kit's settings on the right.

Chapter 1

Get the app

Three ways to run it, all the same app. Nothing to sign up for, and it never needs the internet once it's open.

  1. 1

    Pick how you'll use it

    Everything is on the app's page. Your kits stay on your device in every version.

    In your browserPress Open in Your Browser. Works on computers, tablets and phones, with nothing to install.
    Android appDownload drum-kit-builder-0.10.0-android.apk and open it. The first time, Android asks you to allow installs from your browser: allow it, then tap Install. Kits and pictures you save go to Documents › Drum Kit Builder.
    WindowsDownload drum-kit-builder-0.10.0-windows.zip, unzip it and double-click Install.cmd. No admin rights needed. Open it from the Start menu or the desktop; remove it from Settings → Apps.

Chapter 2

First steps

A short tour, then a kit to work on.

  1. 2

    Take the tour, your way

    The first time you open a new version, a tour offers two ways through:
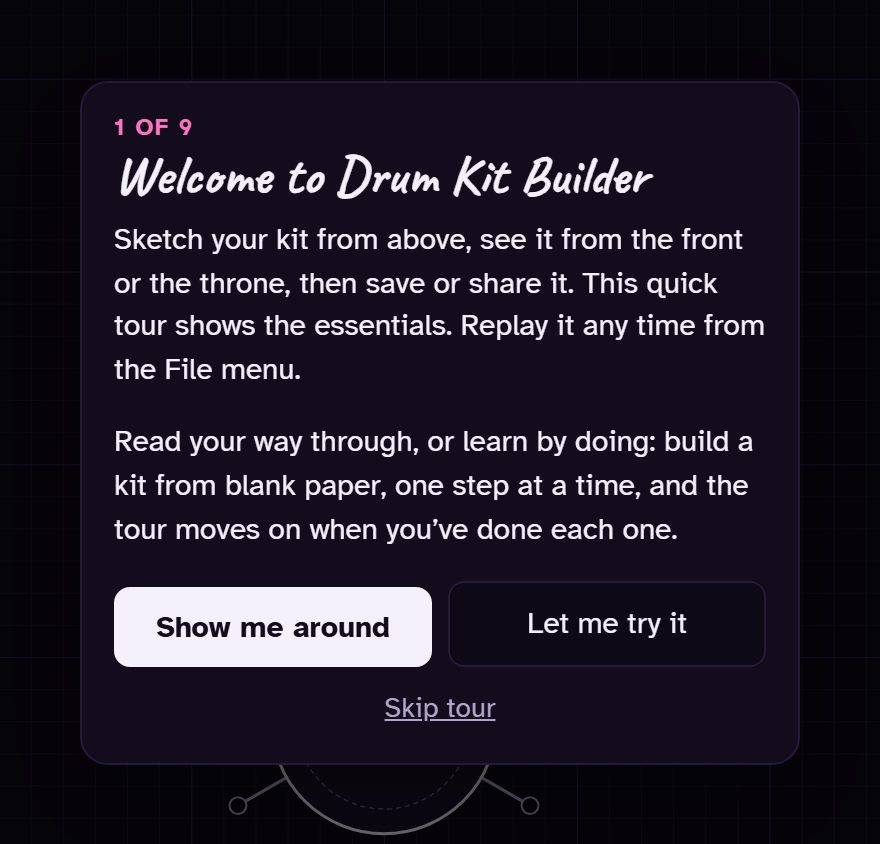
    • Show me around: read each card and press Next.
    • Let me try it: start on blank paper; each card moves on once you've done what it asks, from adding a piece to playing one.
    • Replay it any time from File → Take the tour.
    The welcome card with Show me around, Let me try it and Skip tour.
    The welcome card
  2. 3

    Start a kit

    A new kit is blank graph paper with a throne; the pink crosshair marks the drummer's seat and follows the throne.
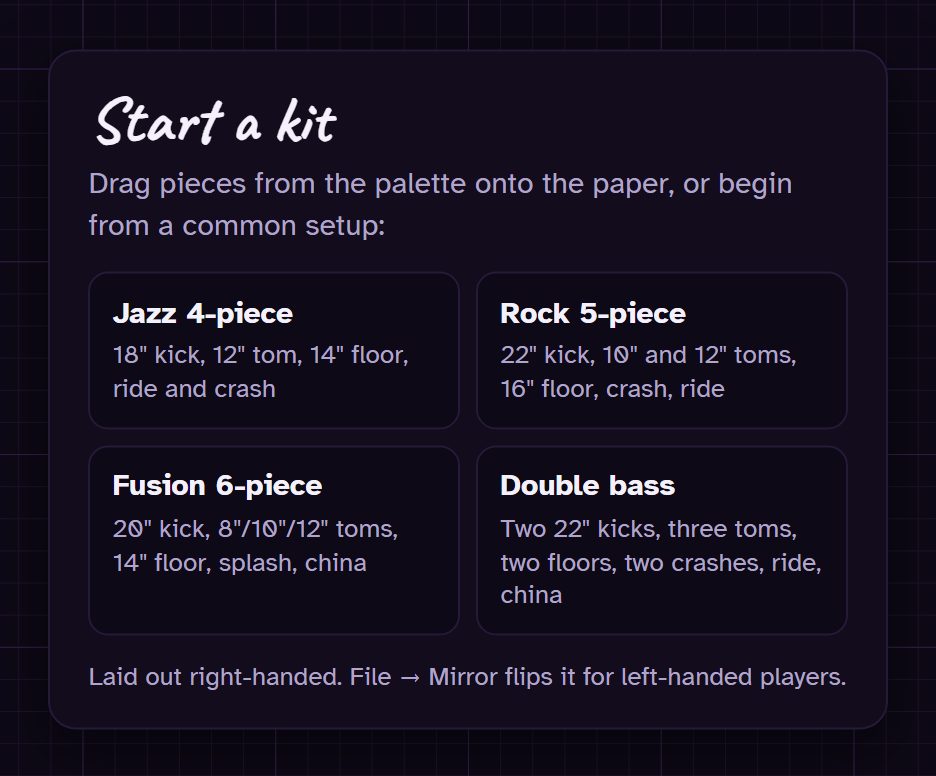
    • Pick a common setup: Jazz 4-piece, Rock 5-piece, Fusion 6-piece or Double bass.
    • They're right-handed; File → Mirror flips any kit for left-handed players.
    • File → New kit and New from a template start another any time.
    The Start a kit card listing four starter layouts.
    Starter layouts

Chapter 3

Build your kit

Everything is drawn to real sizes on a 2-inch grid, so what fits on screen fits on the riser.

  1. 4

    Add pieces

    Drag a drum, cymbal or piece of hardware from the palette onto the paper, or click it to drop it in the middle.
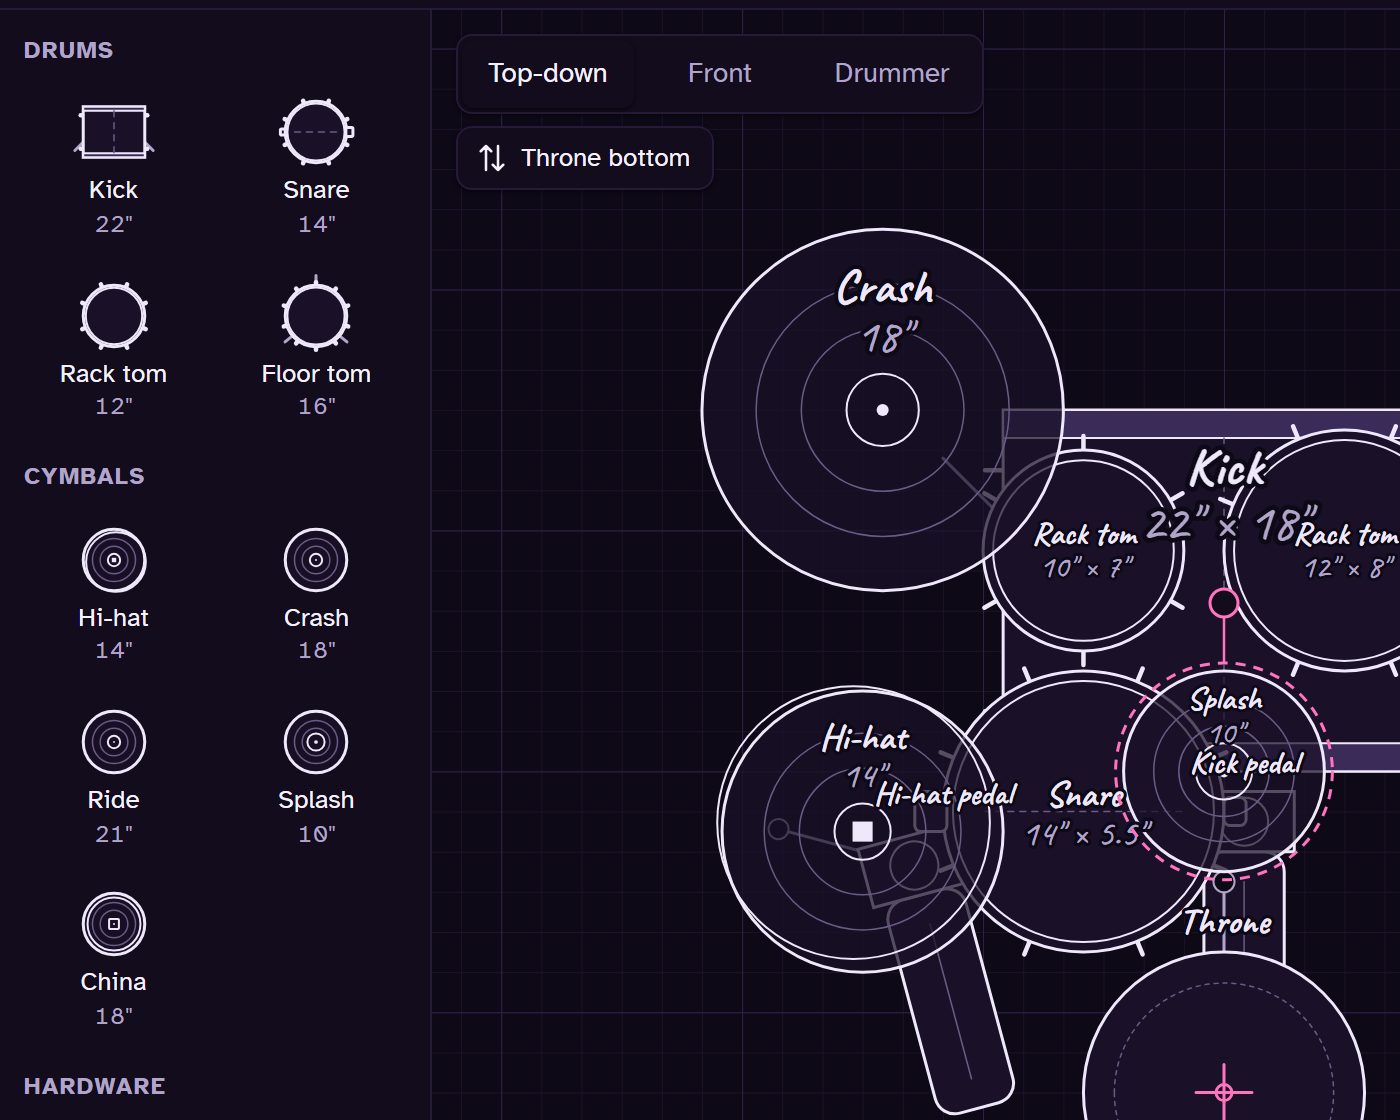
    • Tiles show real default sizes: a 22″ kick, a 14″ snare, an 18″ crash.
    • Hardware includes the throne, pedals, stands and a rack bar; Extras has a cowbell, jam block and tambourine.
    • My pieces keeps any piece you've customised ("Save to My pieces"), and Custom shape makes one of your own.
    The palette beside the paper, with a new splash cymbal added to the kit.
    Palette on the left, paper on the right
  2. 5

    Arrange them

    Click a piece to select it and drag it into place. It snaps to the 2-inch grid.
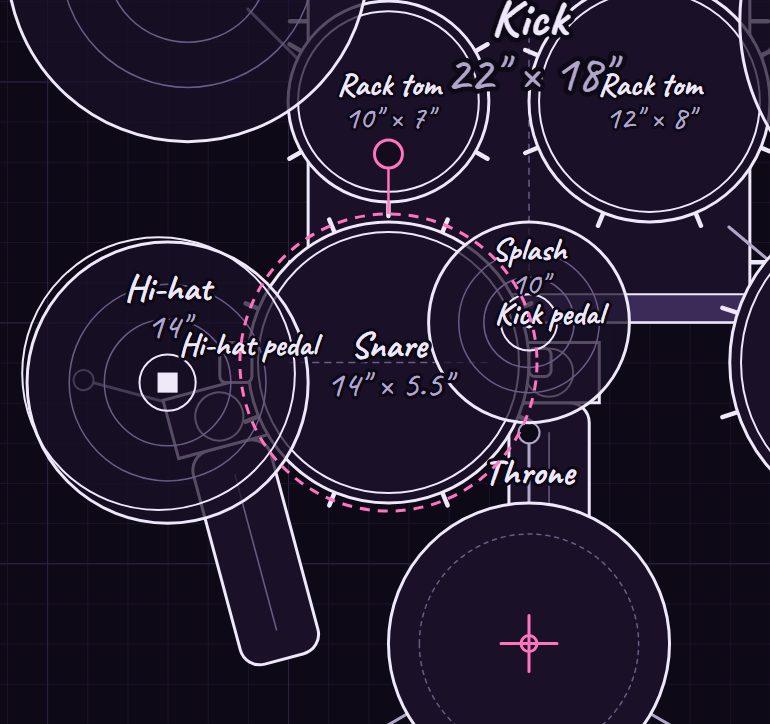
    • Hold Alt (or press and hold on a touch screen) to place it freely.
    • Drag the pink handle to rotate in 15° steps, or press R / Shift+R.
    • Arrow keys nudge a grid step; add Shift for a foot, Alt for half an inch.
    • Shift-click or Shift-drag to select several; Ctrl+D duplicates, Del deletes, Ctrl+Z undoes.
    • Drag empty paper to pan, scroll or pinch to zoom, 0 to fit the kit.
    The snare selected, with its dashed outline and pink rotate handle.
    A selected snare and its rotate handle
  3. 6

    Set each piece's details

    With a piece selected, the panel on the right edits just that piece:
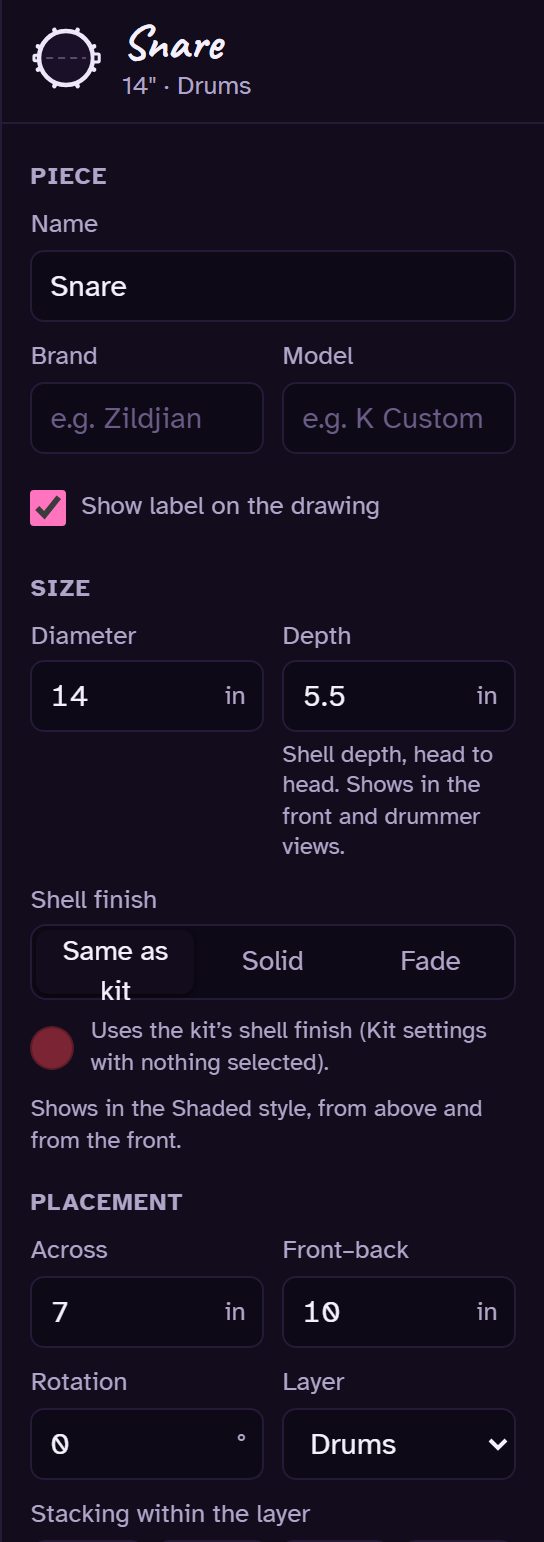
    • Name, brand and model (shown on the drawing if you like).
    • Size: type 22, 22" or 56cm and press Enter.
    • Its own shell finish, position, rotation and layer, and Bottom / Down / Up / Top to restack it.
    • Height, forward tilt and side tilt for the front views (chapter 6).
    • Select several pieces to change them all at once.
    The settings panel for the snare: name, brand, model, size, finish and placement.
    A piece's settings
  4. 7

    Set up the kit itself

    Click empty paper so nothing is selected, and the panel shows the whole kit's settings:
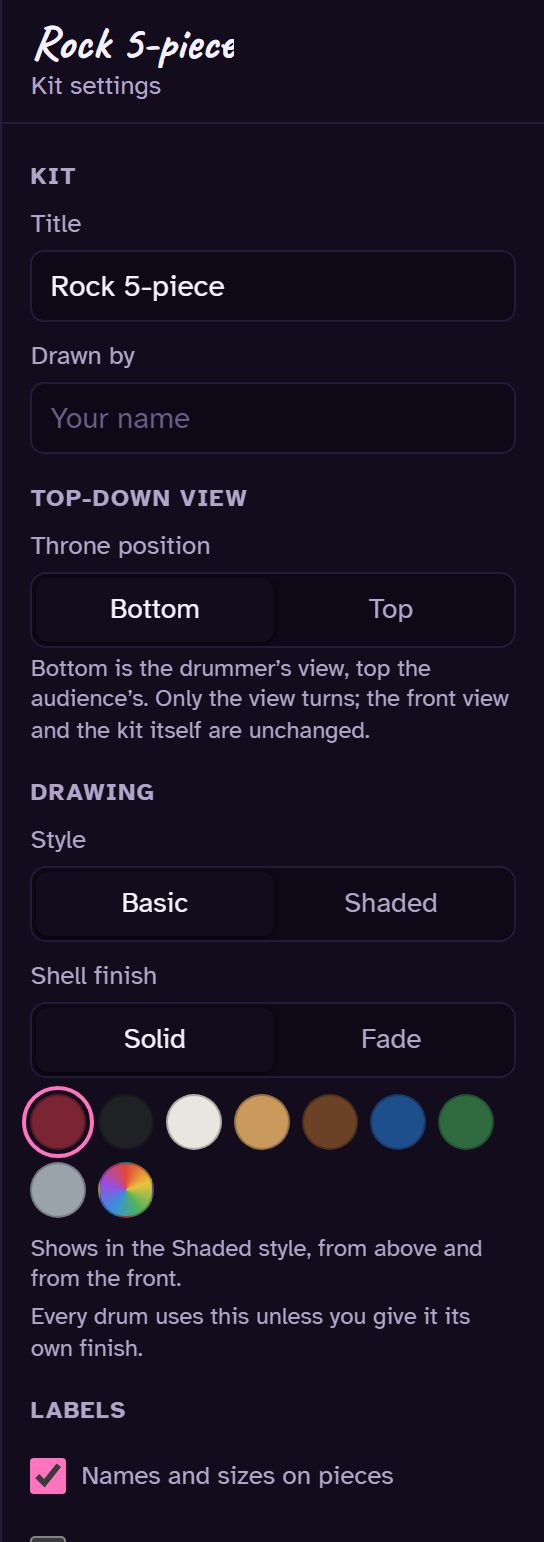
    • Title and "drawn by", used in exports.
    • Throne at the bottom (the drummer's view) or the top (the audience's); Shift+V swaps.
    • Drawing style and the shell finish for every drum.
    • Labels, inches or centimetres, grid size and snapping, and a clickable parts list.
    The kit settings panel with title, throne position, drawing style and shell finish.
    Kit settings

Chapter 4

Layers and notes

Keep busy kits workable, and mark them up for the band or the stage crew.

  1. 8

    Use layers

    The stack button in the toolbar opens the layers: annotations, cymbals, drums, and hardware and racks.
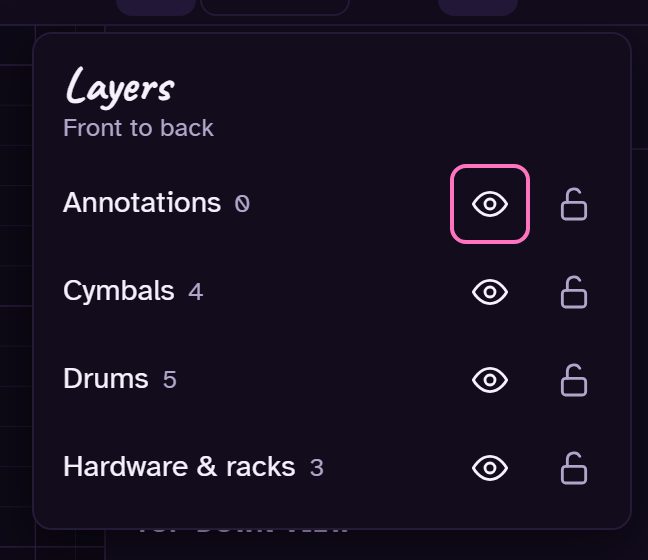
    • The eye hides a layer; the lock keeps it visible but untouchable, so you can work on cymbals over locked drums.
    • Hidden and locked pieces are left out of selections.
    The Layers menu with Annotations, Cymbals, Drums and Hardware, each with show and lock buttons.
    The Layers menu
  2. 9

    Add notes, arrows and measurements

    The palette's Annotate tiles add text notes, arrows and dimension lines.
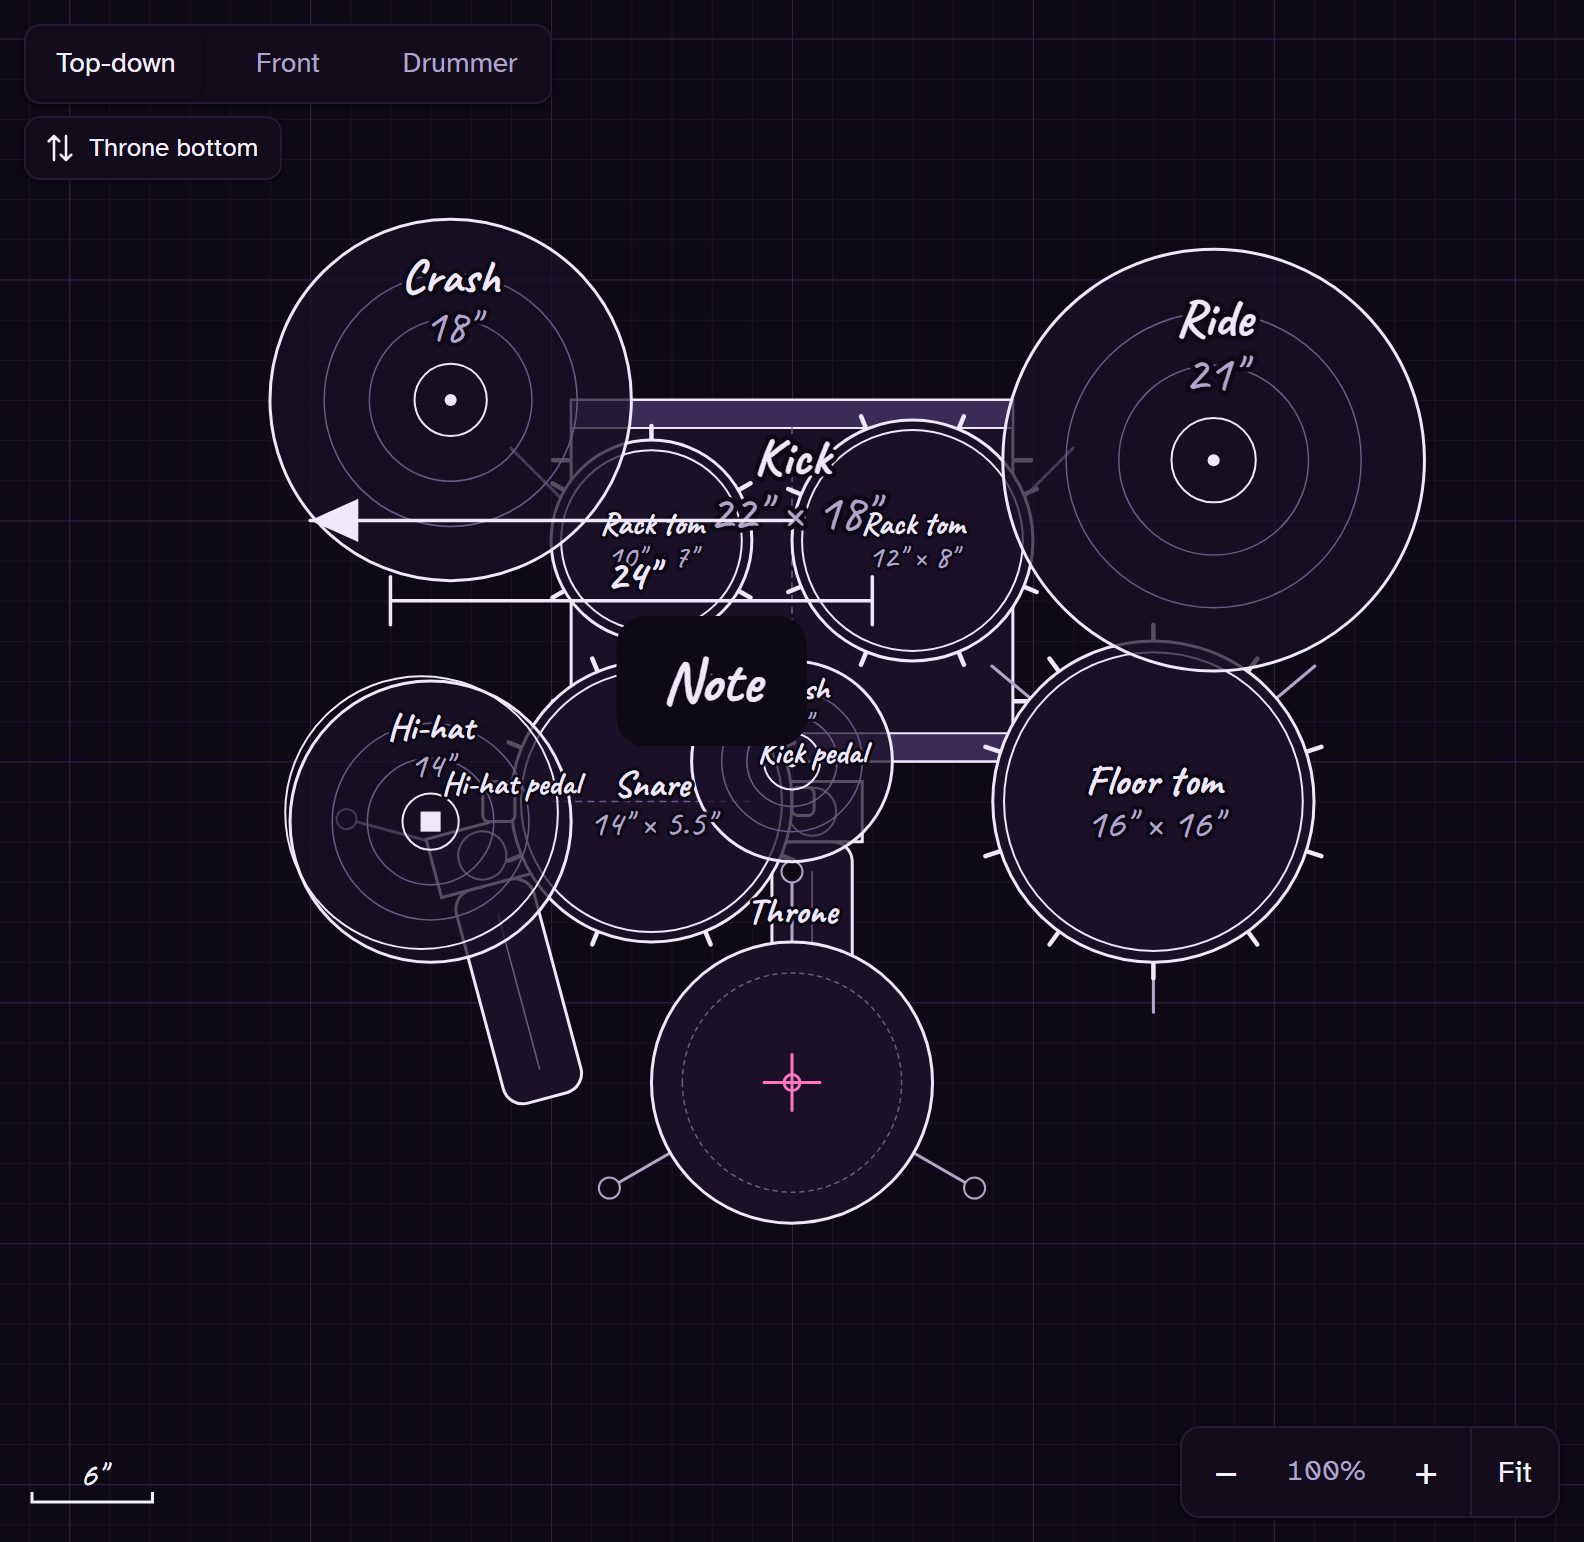
    • Double-click a note to edit its text.
    • Drag an arrow or dimension by its square ends; they stick to drum centres (Alt for free).
    • Dimension lines show their length, so you can measure drum to drum.
    The kit with a text note, an arrow and a dimension line added.
    A note, an arrow and a dimension line

Chapter 5

Make it yours

From a quick pencil sketch to something that looks like your actual kit.

  1. 10

    Shaded style and shell finishes

    The half-filled circle in the toolbar switches from line art to the Shaded style, with bronze cymbals, coated heads and chrome hardware.
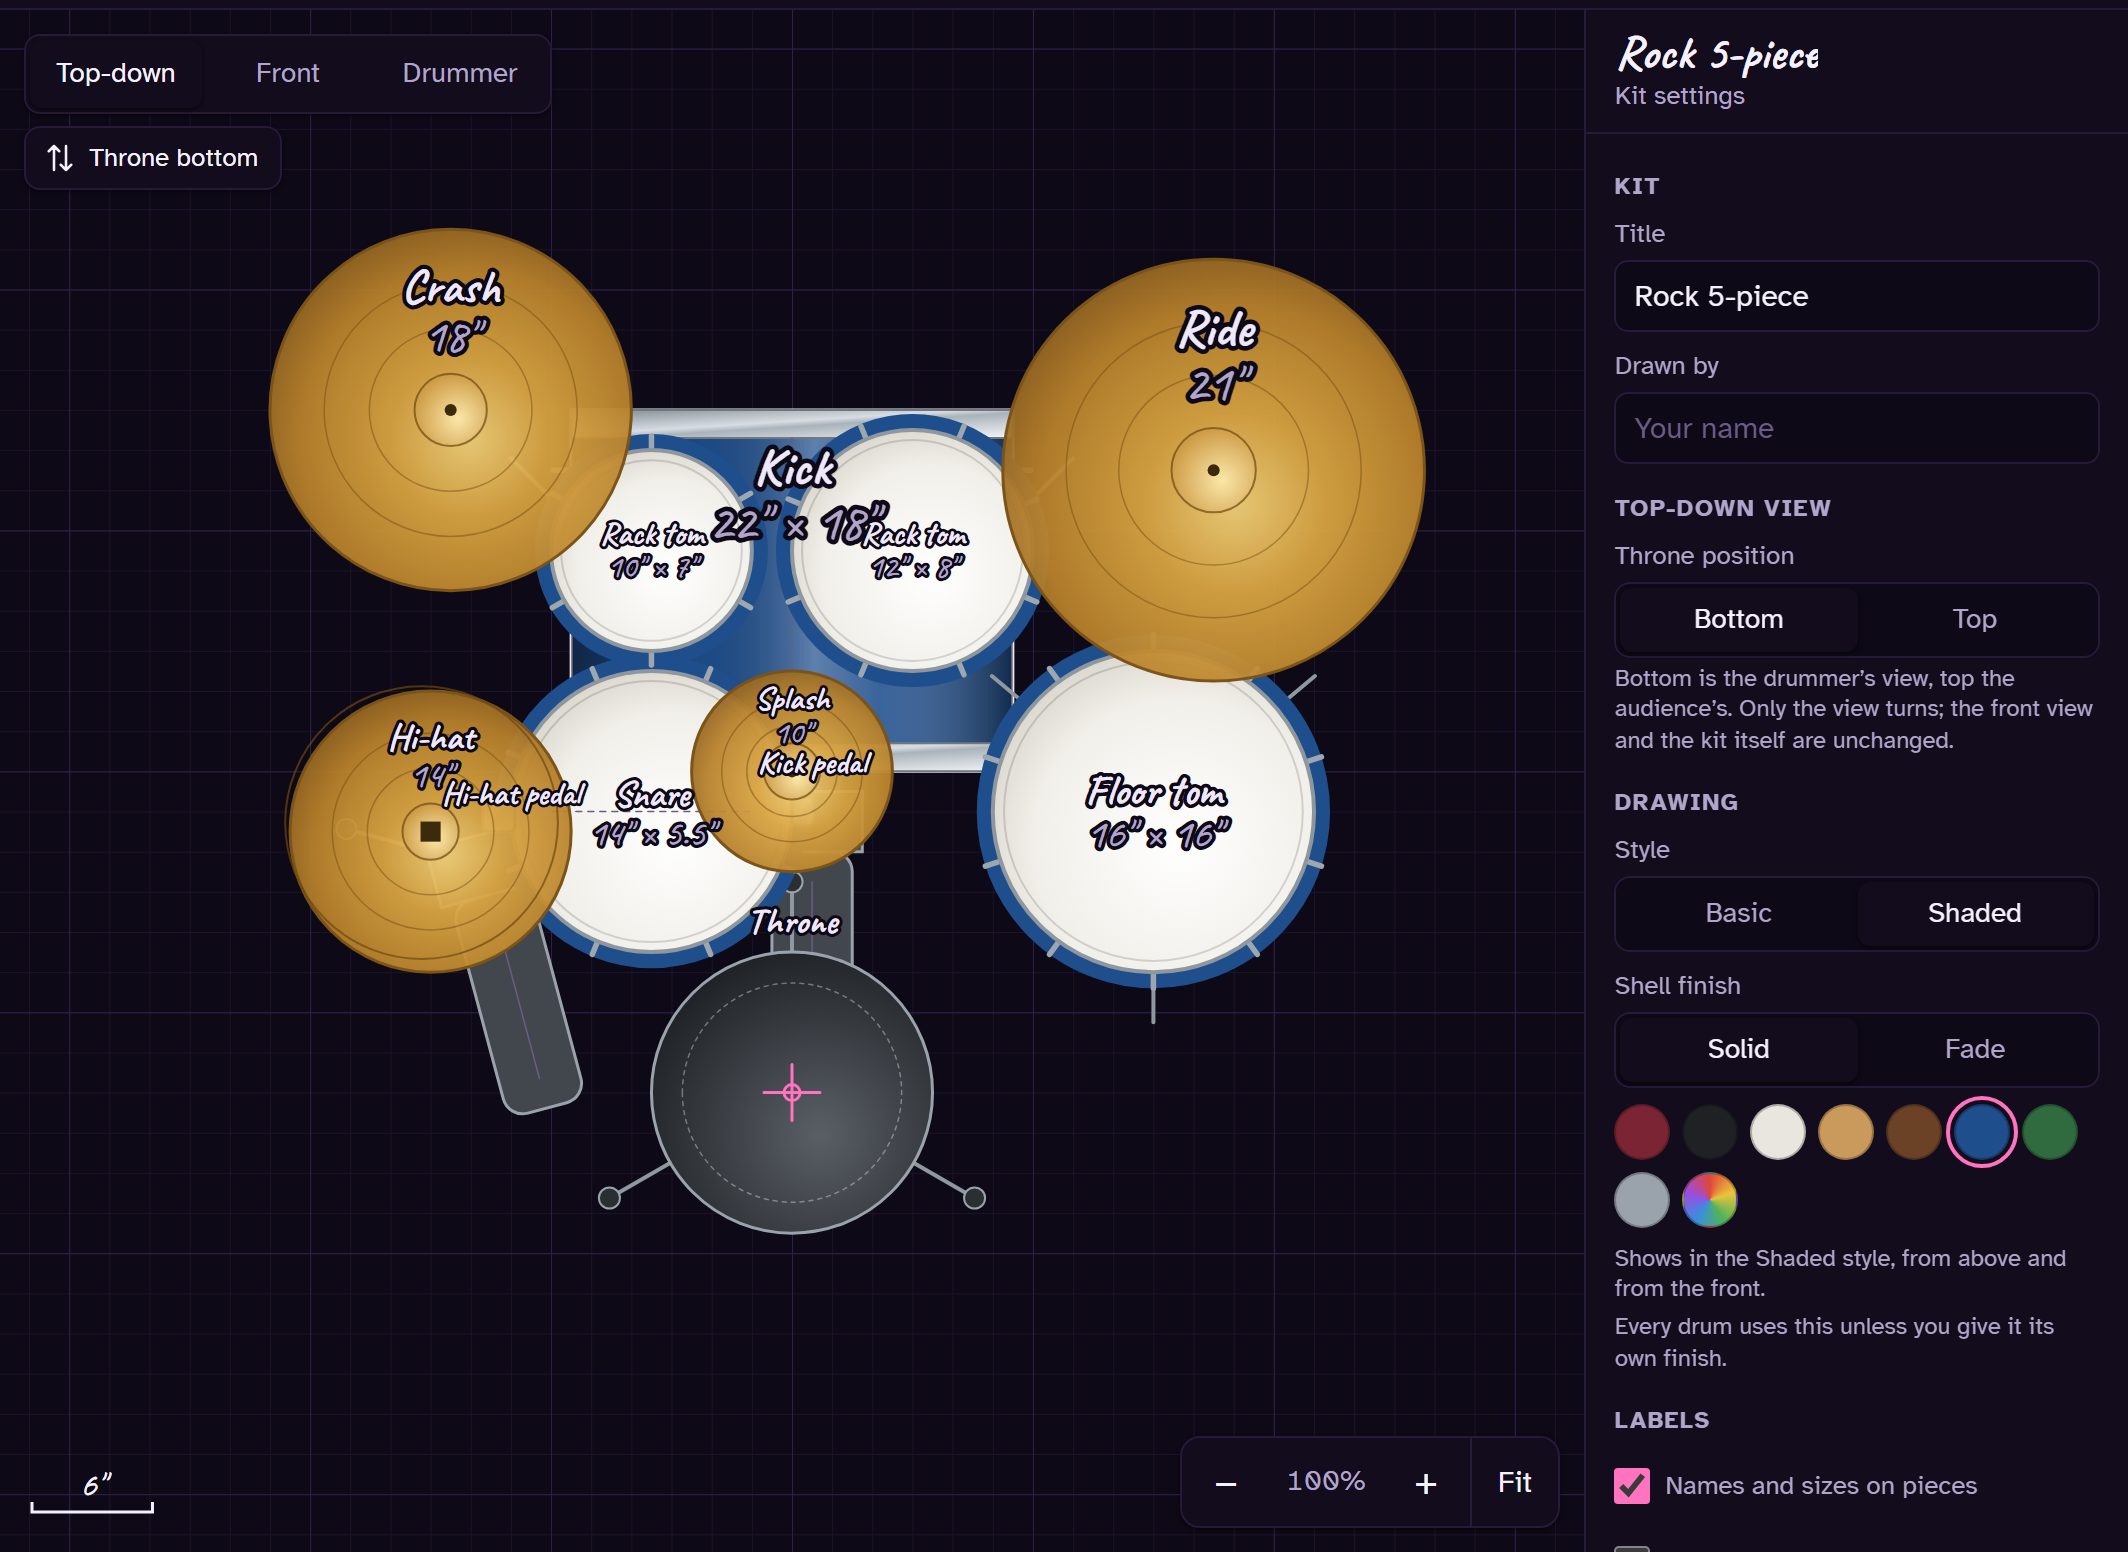
    • Kit settings → Shell finish colours every drum: Solid (presets or any colour) or Fade between two.
    • Give one drum its own finish in its settings, or leave it on "Same as kit".
    The kit in the Shaded style with ocean blue shells and bronze cymbals.
    Shaded, with an Ocean blue finish
  2. 11

    Dark or light

    The app follows your device's theme until you pick one with the sun and moon button (or File → Dark mode on phones).
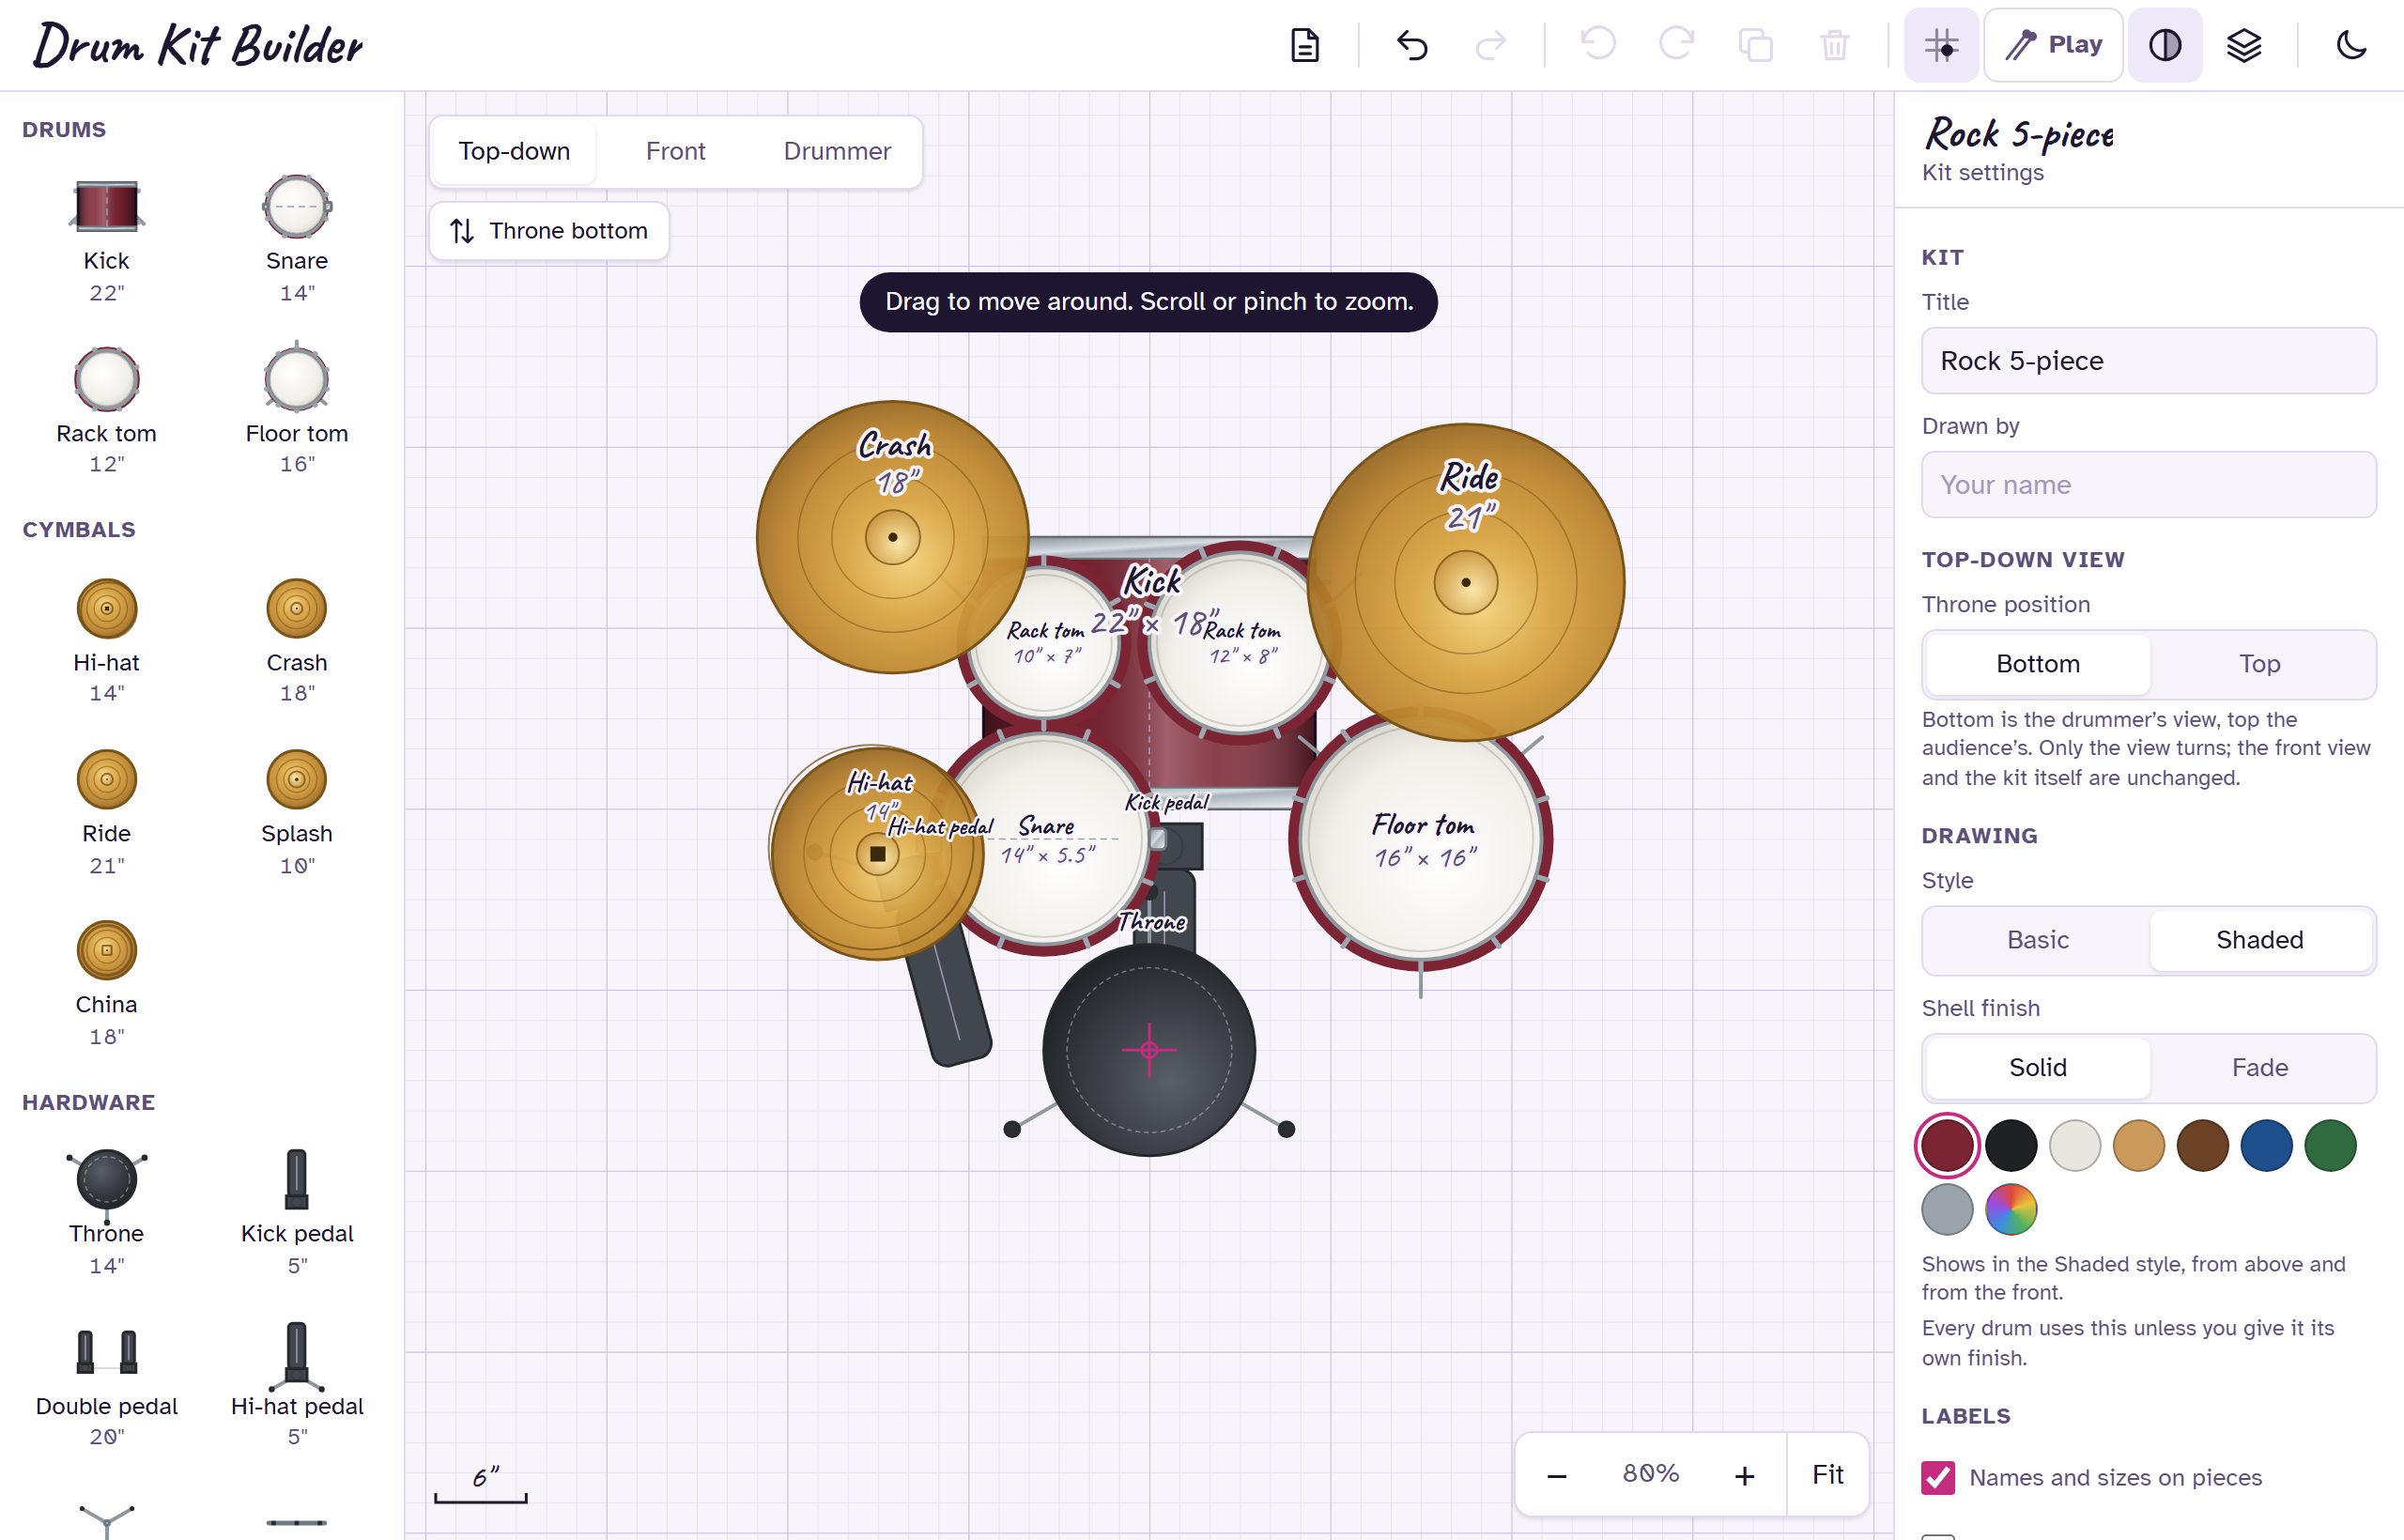
    The app in its light theme, with lavender graph paper.
    The light theme

Chapter 6

Every side, every angle

You arrange from above; the other two views are built from the same layout, so they always agree.

  1. 12

    See it from the front

    The view switch (or V) shows Front: the kit as the audience sees it, each piece at its height and angle, with a height ruler and the floor.
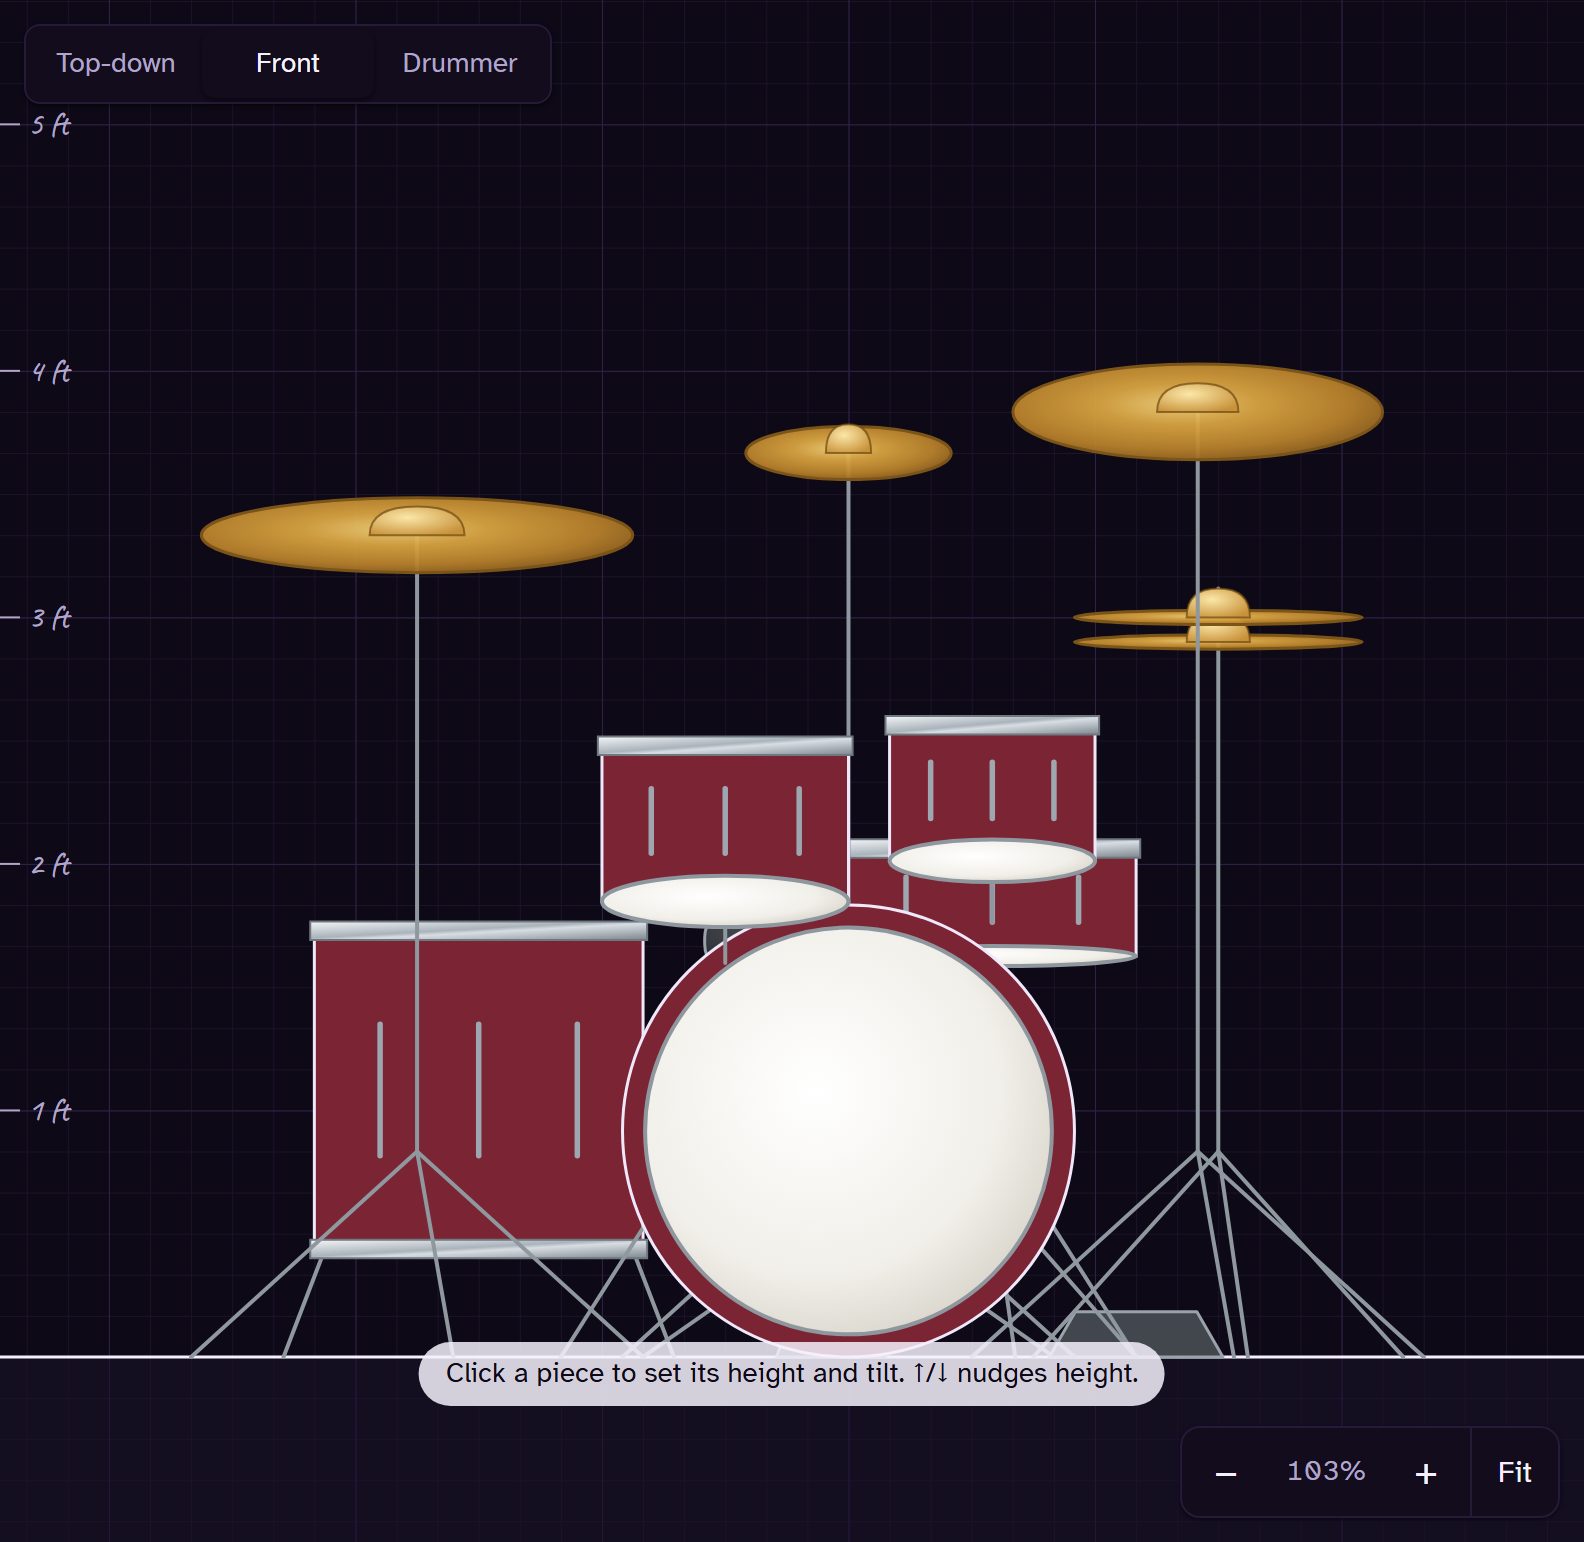
    The front view of the kit with a height ruler.
    Front view
  2. 13

    Set heights and tilts

    Click a piece in the Front or Drummer view and set it in the panel:
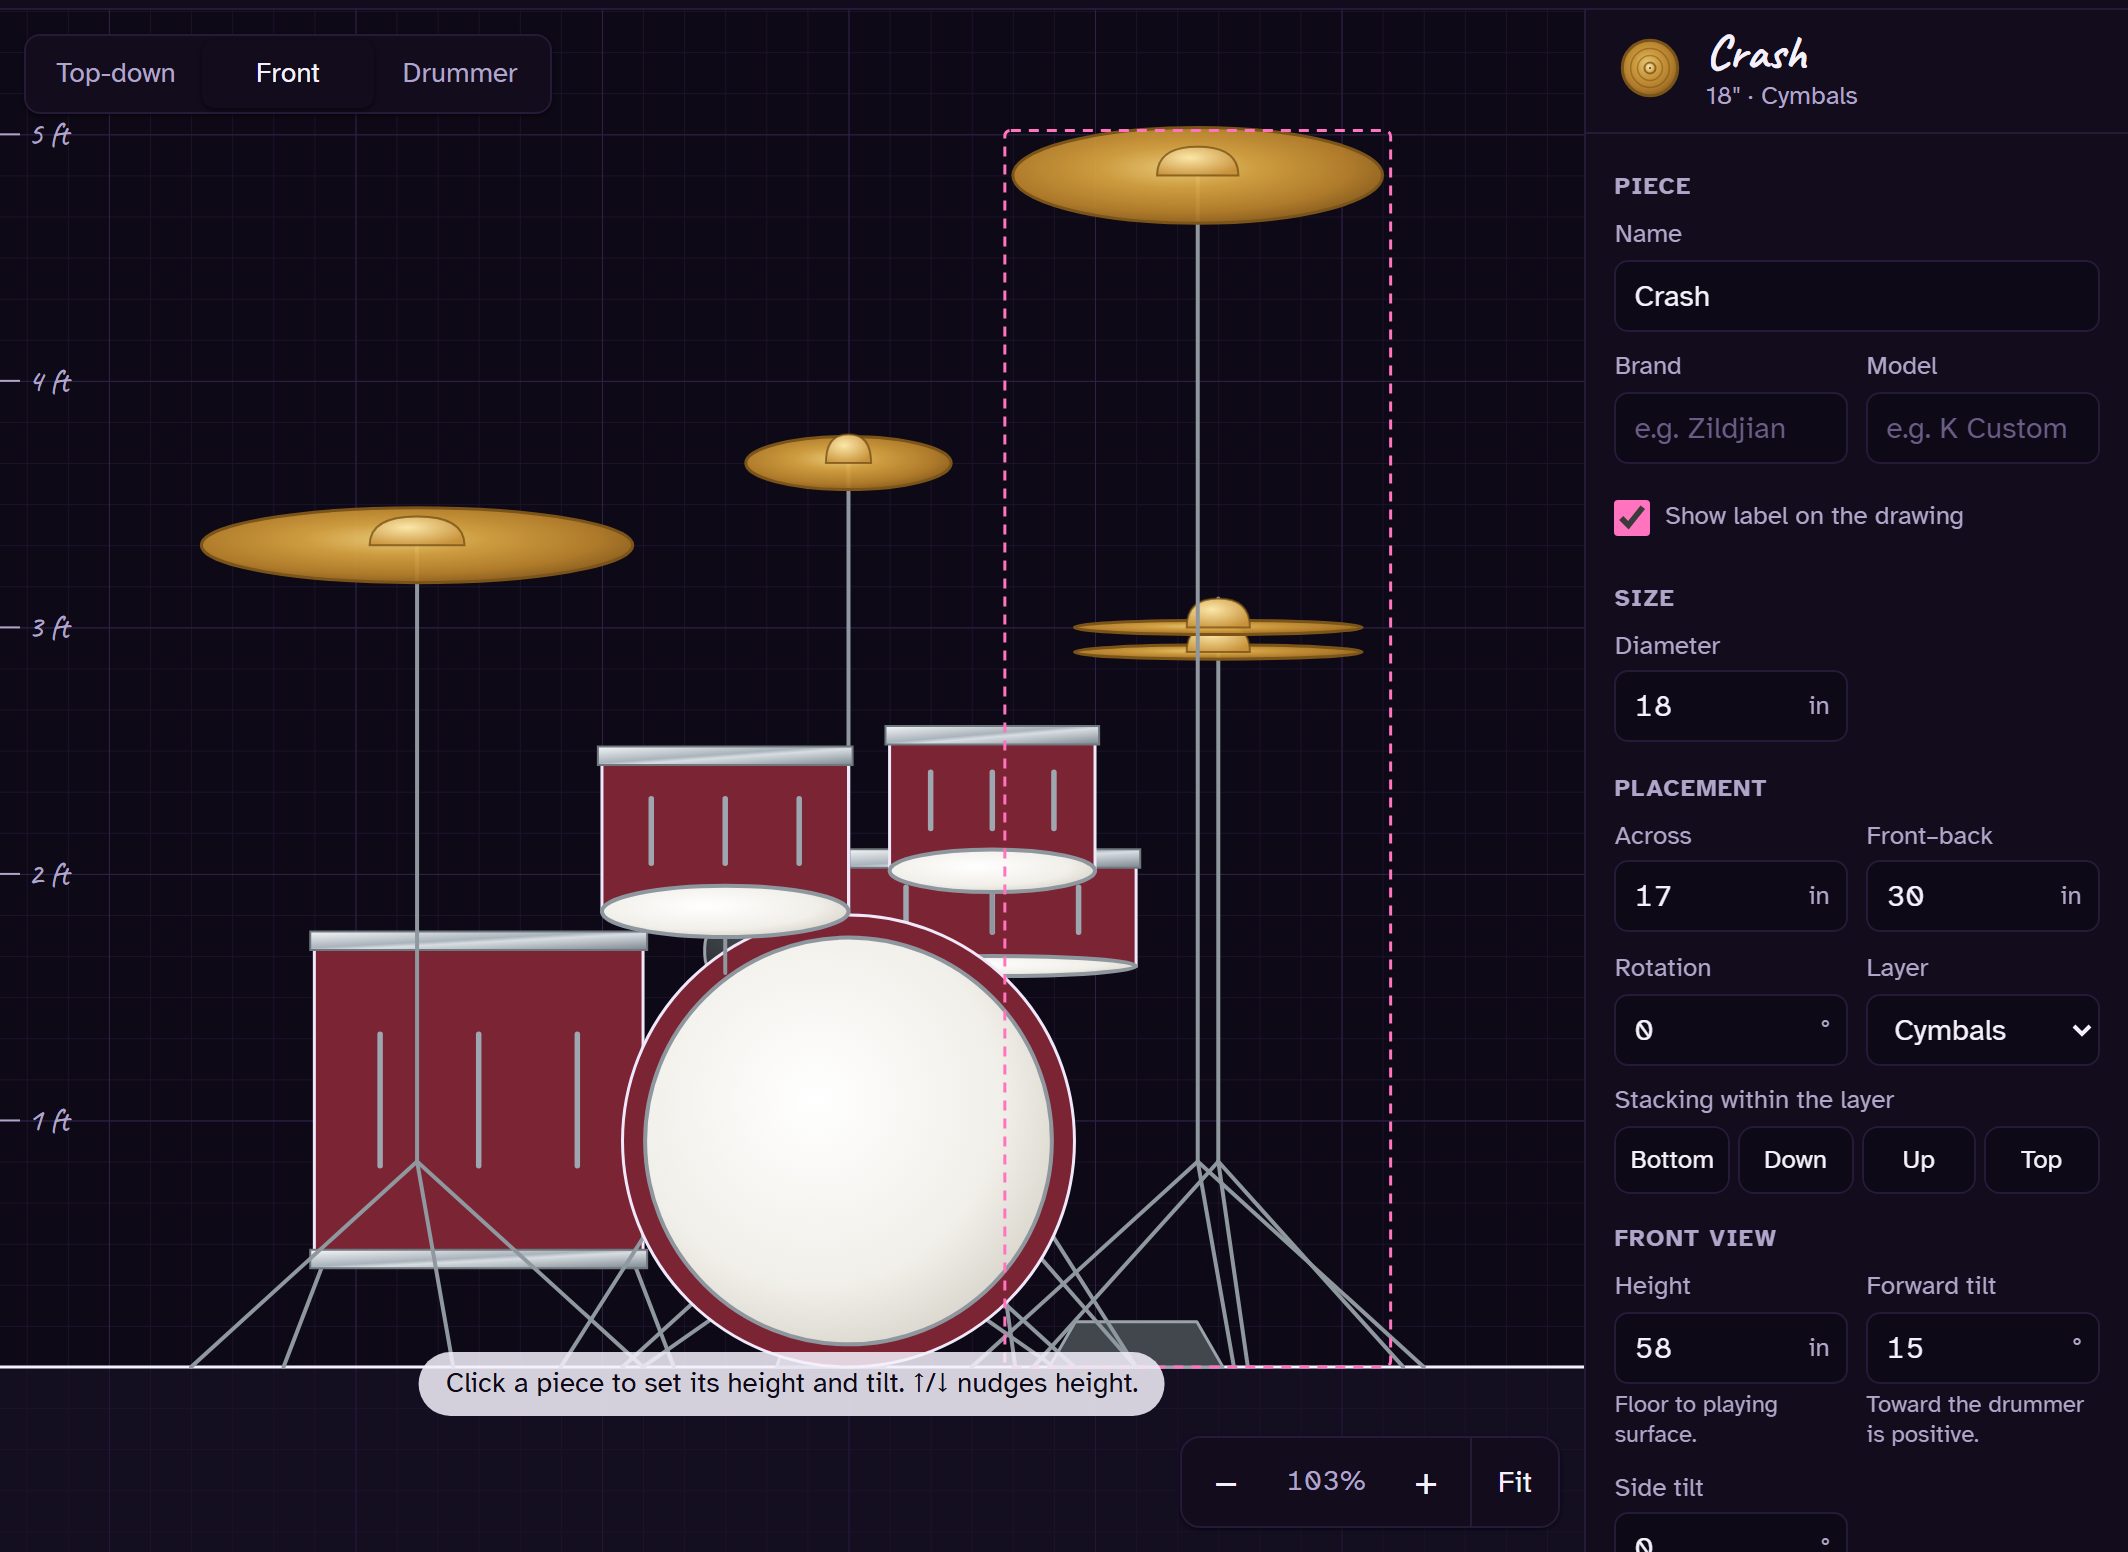
    • Height: floor to playing surface. ↑/↓ nudge it an inch (Shift for 6″, Alt for ½″).
    • Forward tilt: toward the drummer is positive.
    • Side tilt: toward the drummer's right is positive.
    The crash raised in the front view, with its height, forward tilt and side tilt in the settings panel.
    The crash raised, its height in the panel
  3. 14

    Sit behind it

    Drummer shows the kit from the throne, looking out: the drummer's left on the left, the nearest pieces in front, tilted drums showing their top heads.
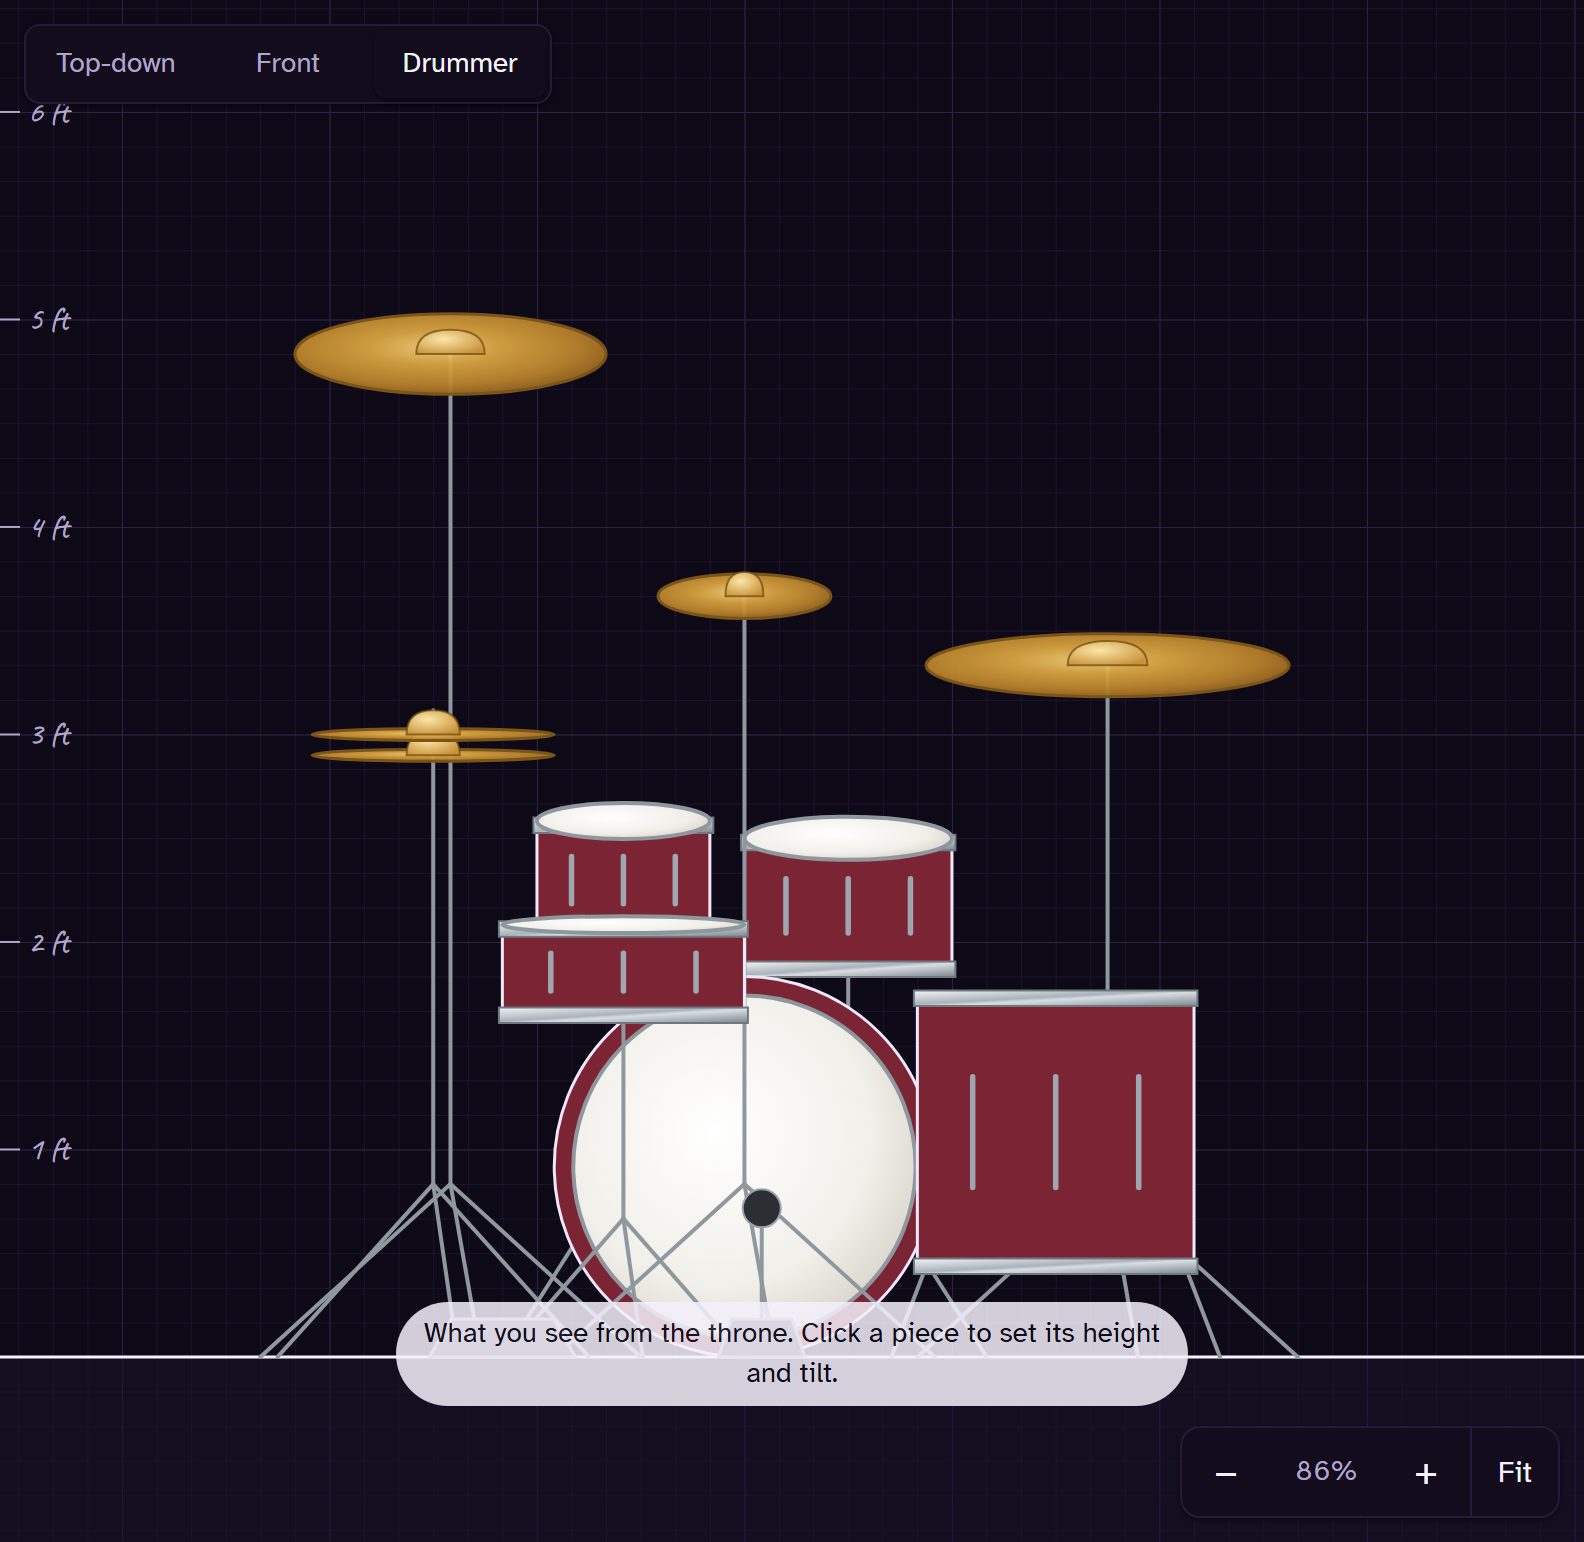
    The drummer's view of the kit from the throne.
    Drummer view

Chapter 7

Hear it

  1. 15

    Play mode

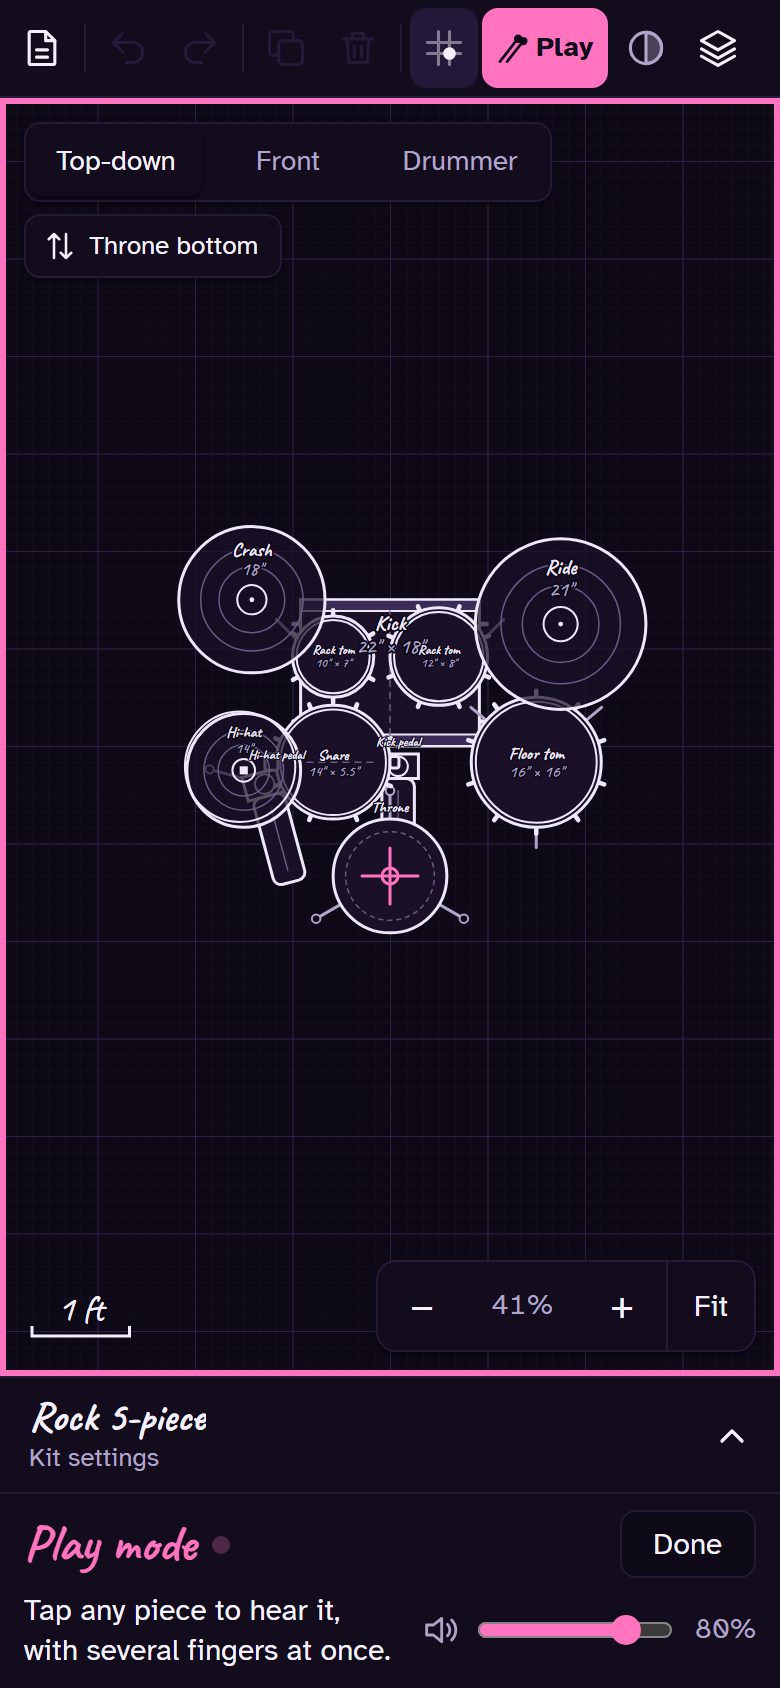
    Press Play in the toolbar (or P): it turns pink, the paper gets a pink frame, and the play panel takes the palette's place. Click or tap any piece to hear it, in any view.
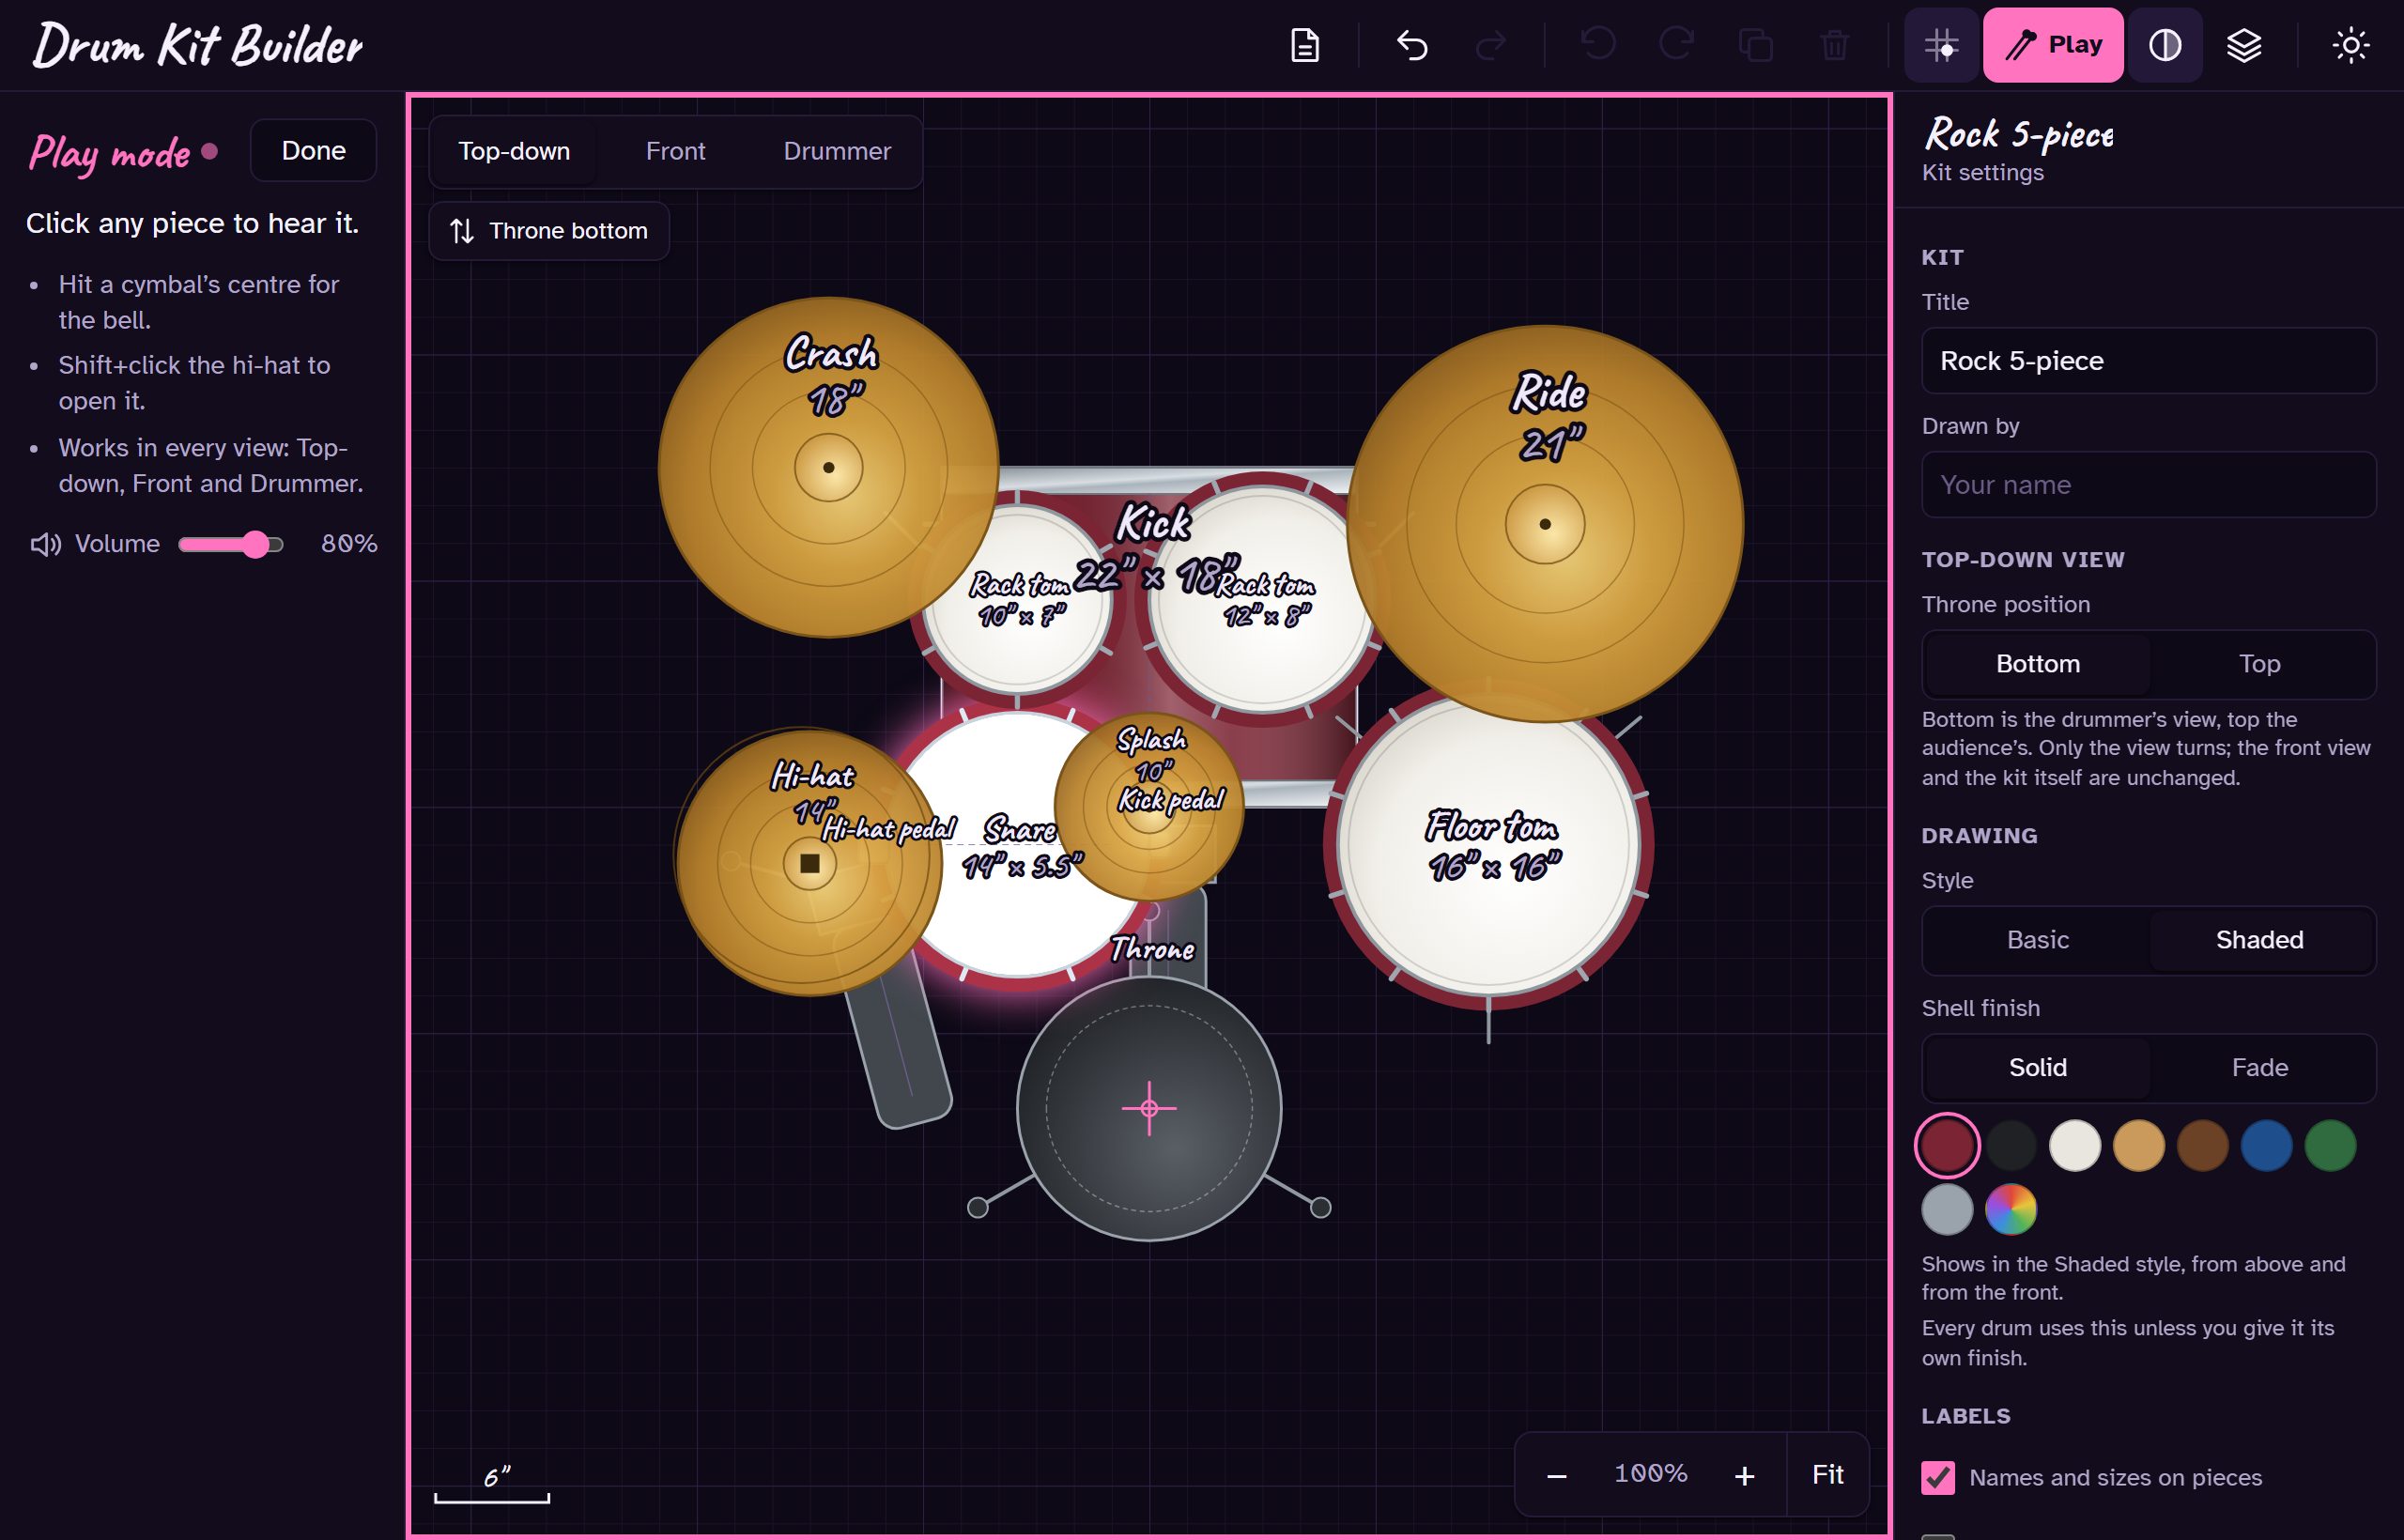
    • Sounds follow sizes: small drums higher, big cymbals lower and longer.
    • Hit a cymbal's centre for the bell; Shift-click the hi-hat to open it.
    • Several fingers at once on a touch screen. Set the volume in the panel.
    • Esc or Done goes back to editing.
    Play mode: the play panel on the left, a pink frame round the paper and the snare lit up.
    Play mode, with the snare just hit

Chapter 8

Save and share

Your kit saves itself as you work. To keep a copy or send it, use the File menu.

  1. 16

    Kit files and saved kits

    • Kits in this browser lists every kit you've made; pick one to switch.
    • Save to a file (Ctrl+S) writes a .drumkit file; after that, Save updates the same file. Save as picks a new one.
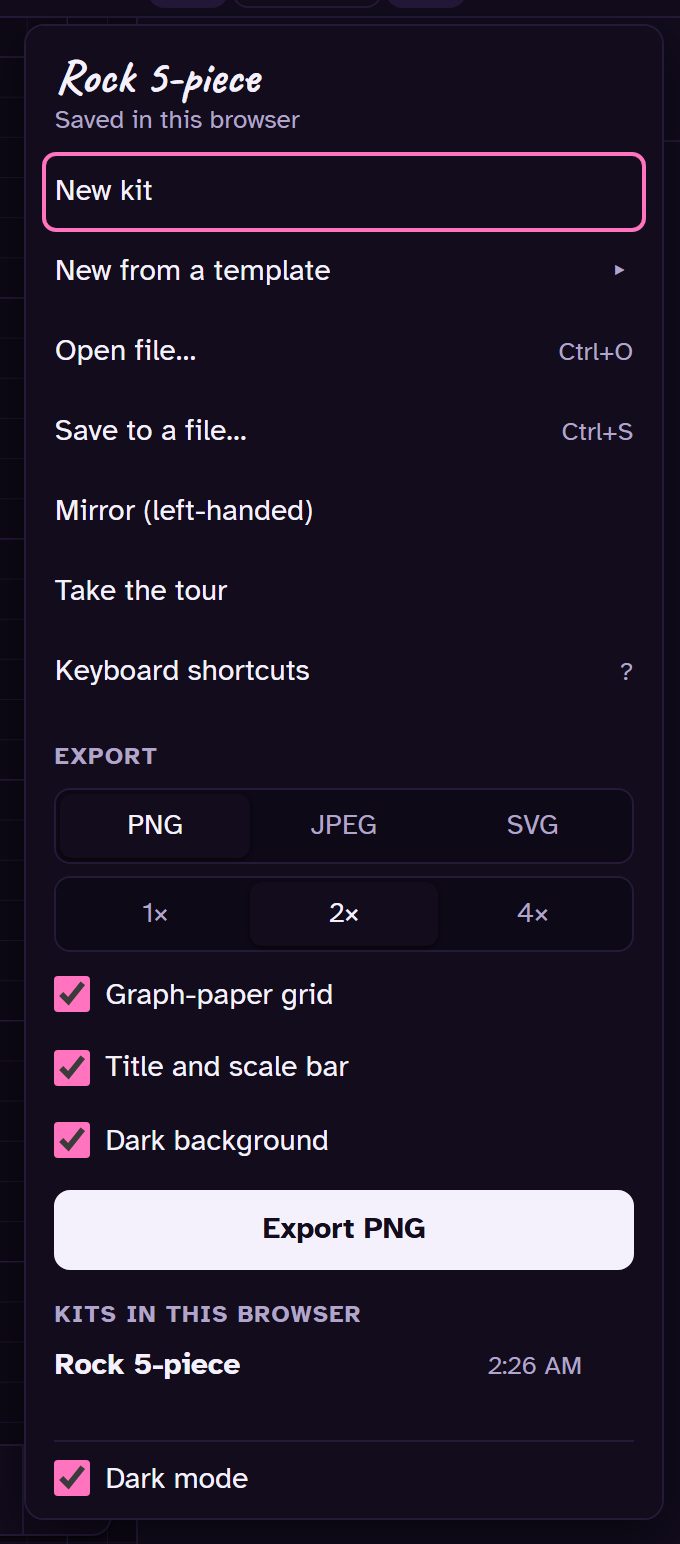
    • Open file (Ctrl+O), or drop a kit file on the window, to open one someone sent you.
    The File menu with New kit, Open, Save, Mirror, Take the tour, the export options and the saved kits.
    The File menu
  2. 17

    Export a picture

    Export saves the view you're looking at as a PNG, JPEG (1×, 2× or 4× size) or SVG, with the handwriting font built in.
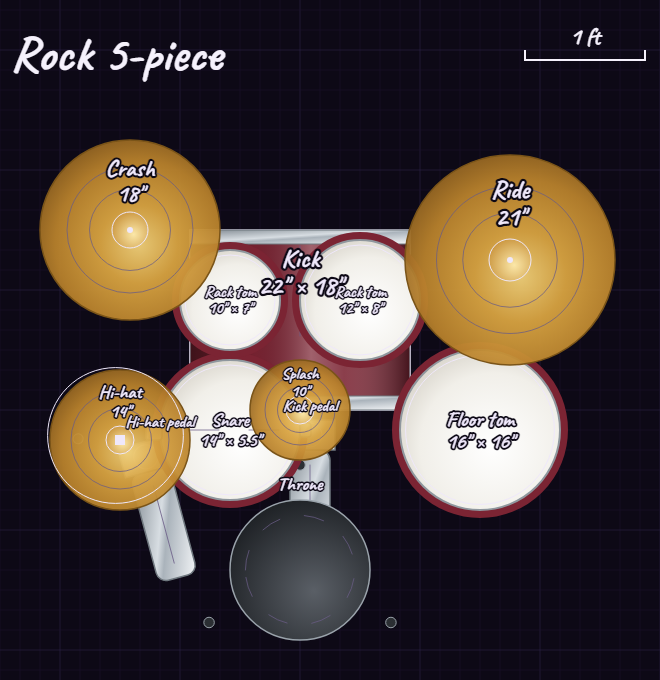
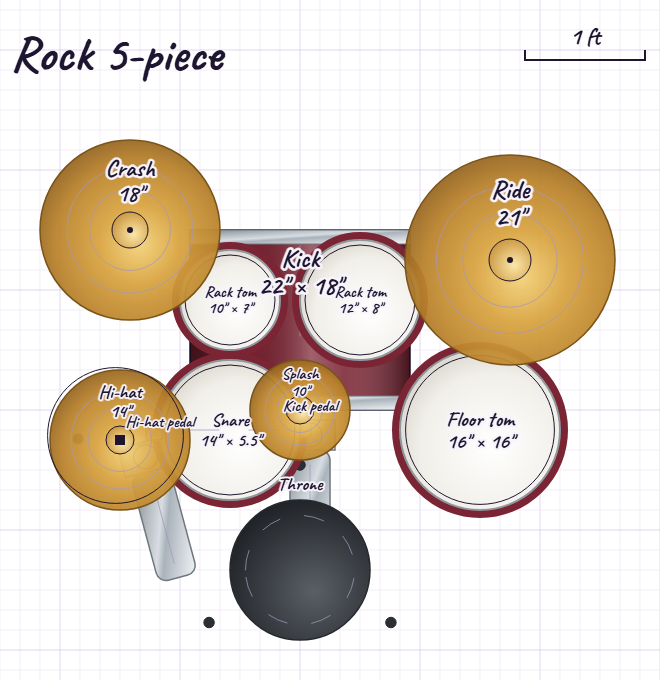
    • Graph-paper grid and a title with a one-foot scale bar, each optional.
    • Dark background keeps the app's dark look; untick it for light paper, better for printing.
    • Switch to Front or Drummer first to export that view.
    An exported picture of the kit on dark paper.
    Dark background
    The same export on light paper.
    Light paper

Chapter 9

On a phone

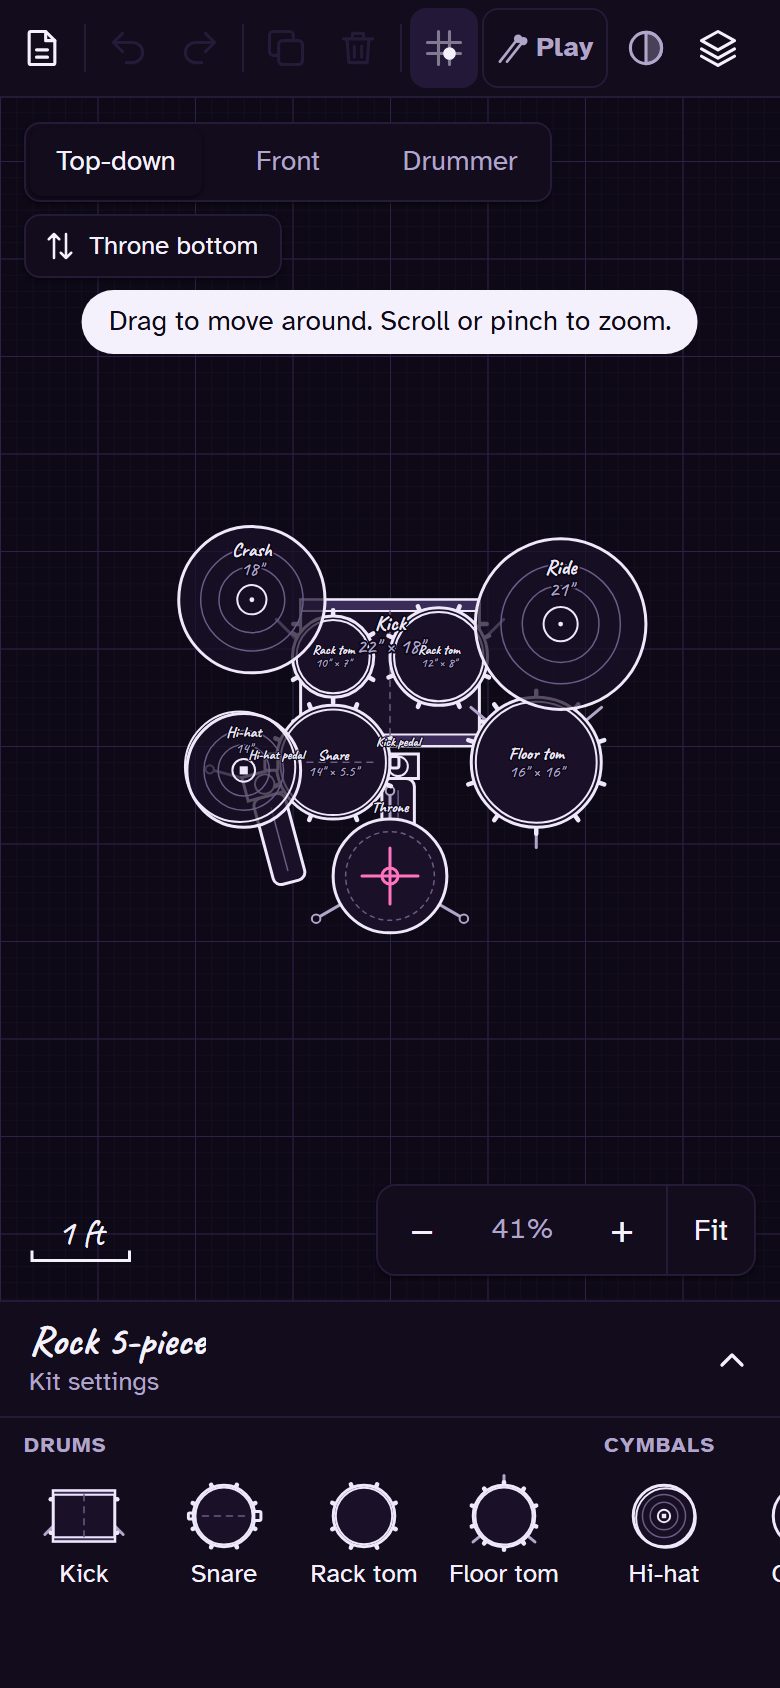
The same app, laid out for one hand: the palette along the bottom, settings in a sheet above it.
  1. 18

    Tap, drag and pinch

    • Tap a tile to add a piece; swipe the strip for more.
    • Tap a piece, then drag it; press and hold first to place it freely. Two fingers pan and zoom.
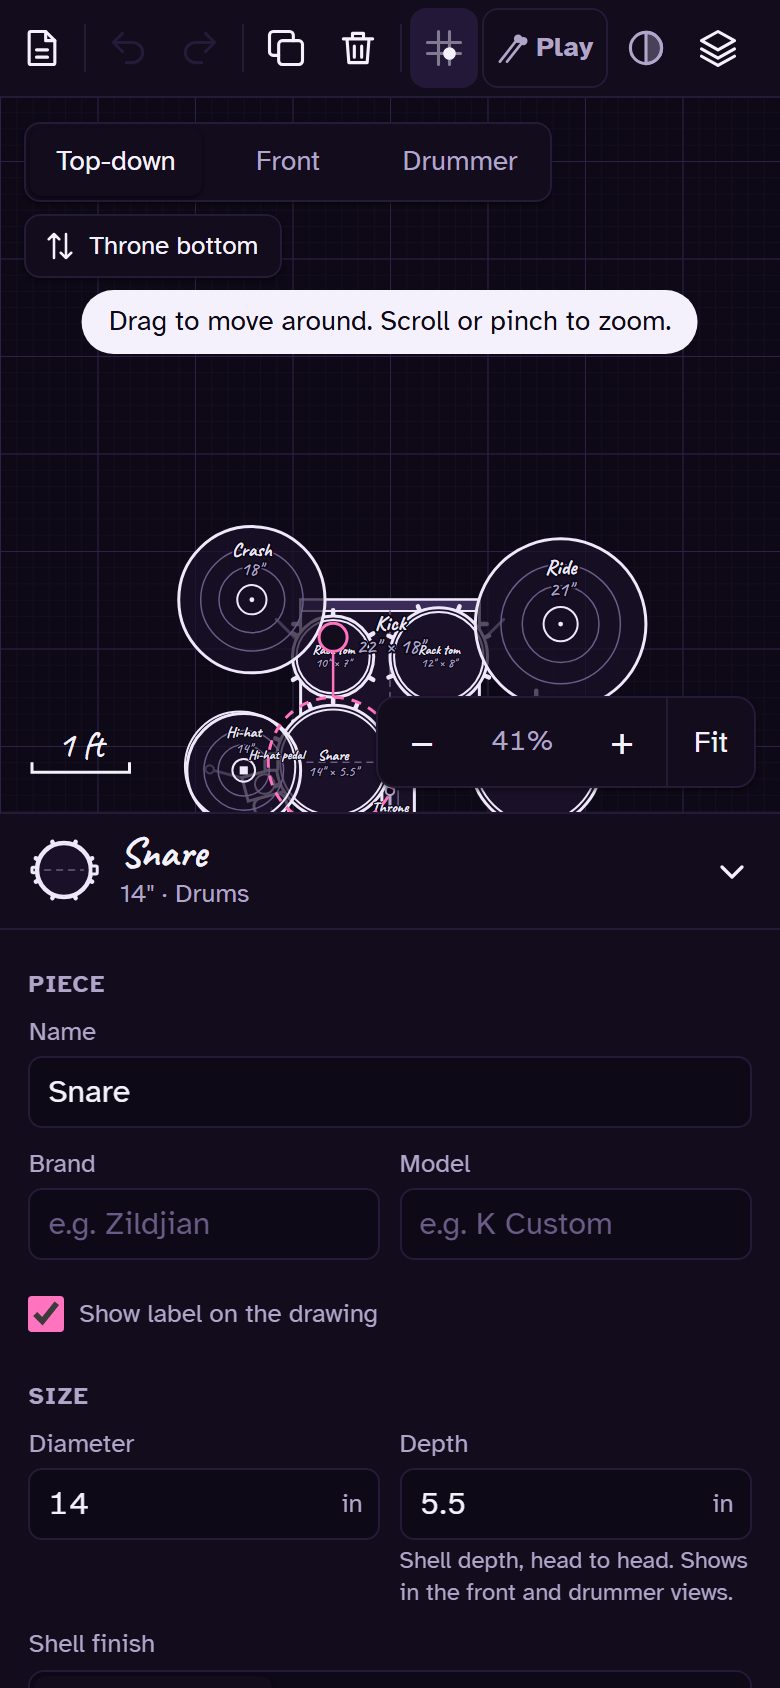
    • Tap the bar above the palette to open the piece's settings sheet.
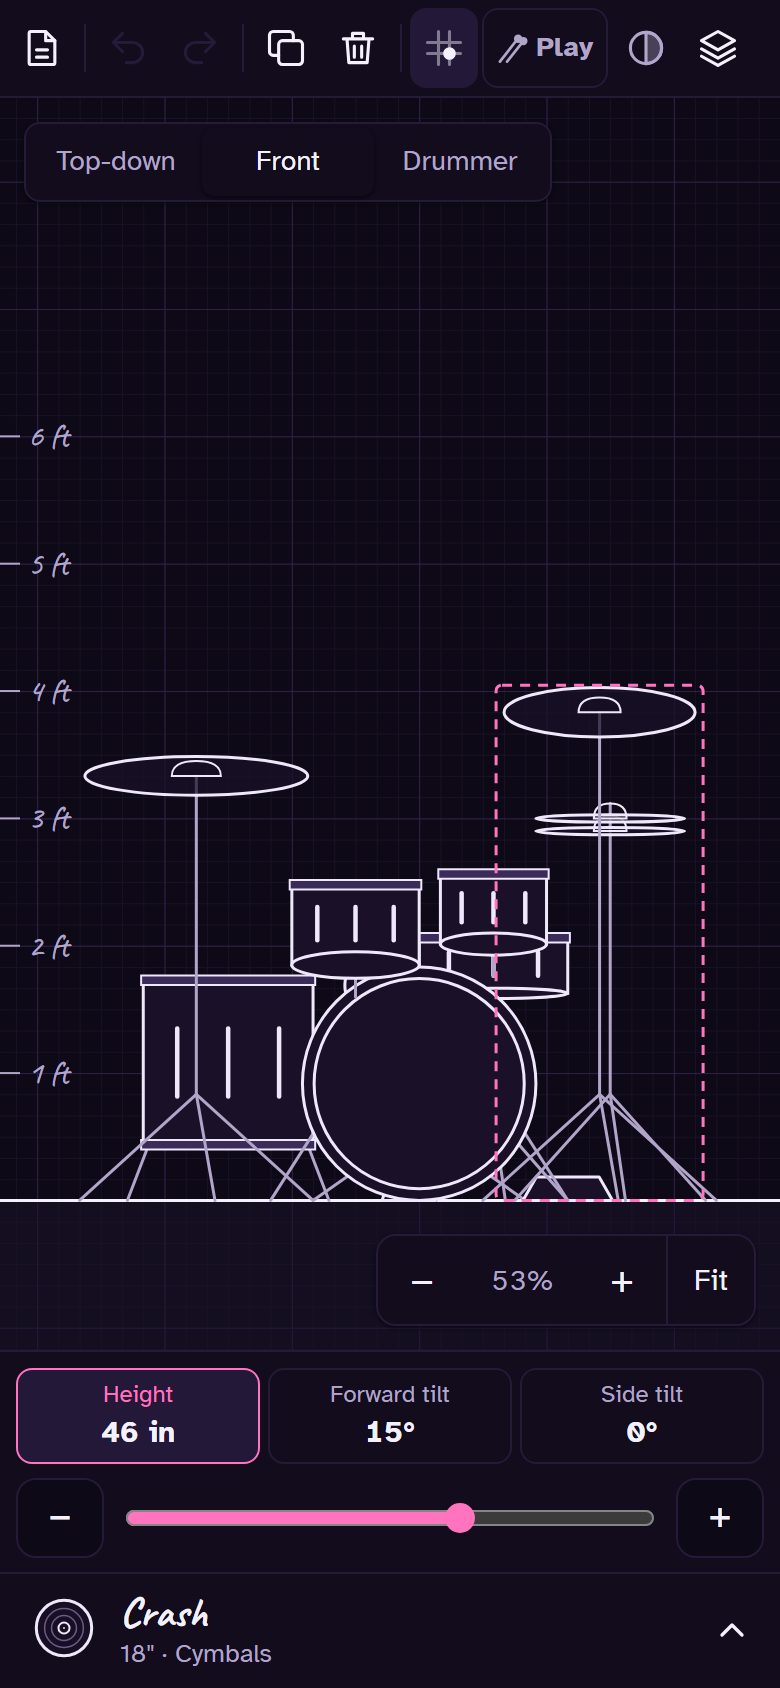
    • In the Front and Drummer views, tapping a piece swaps the palette for a Height / Forward tilt / Side tilt bar with a slider.
    • Play mode's panel sits in the same spot.
    The app on a phone with the kit and the bottom palette.
    Top-down
    The settings sheet open for the snare on a phone.
    Settings sheet
    The front view on a phone with the height and tilt bar.
    Height and tilt bar
    Play mode on a phone.
    Play mode

Chapter 10

Shortcuts

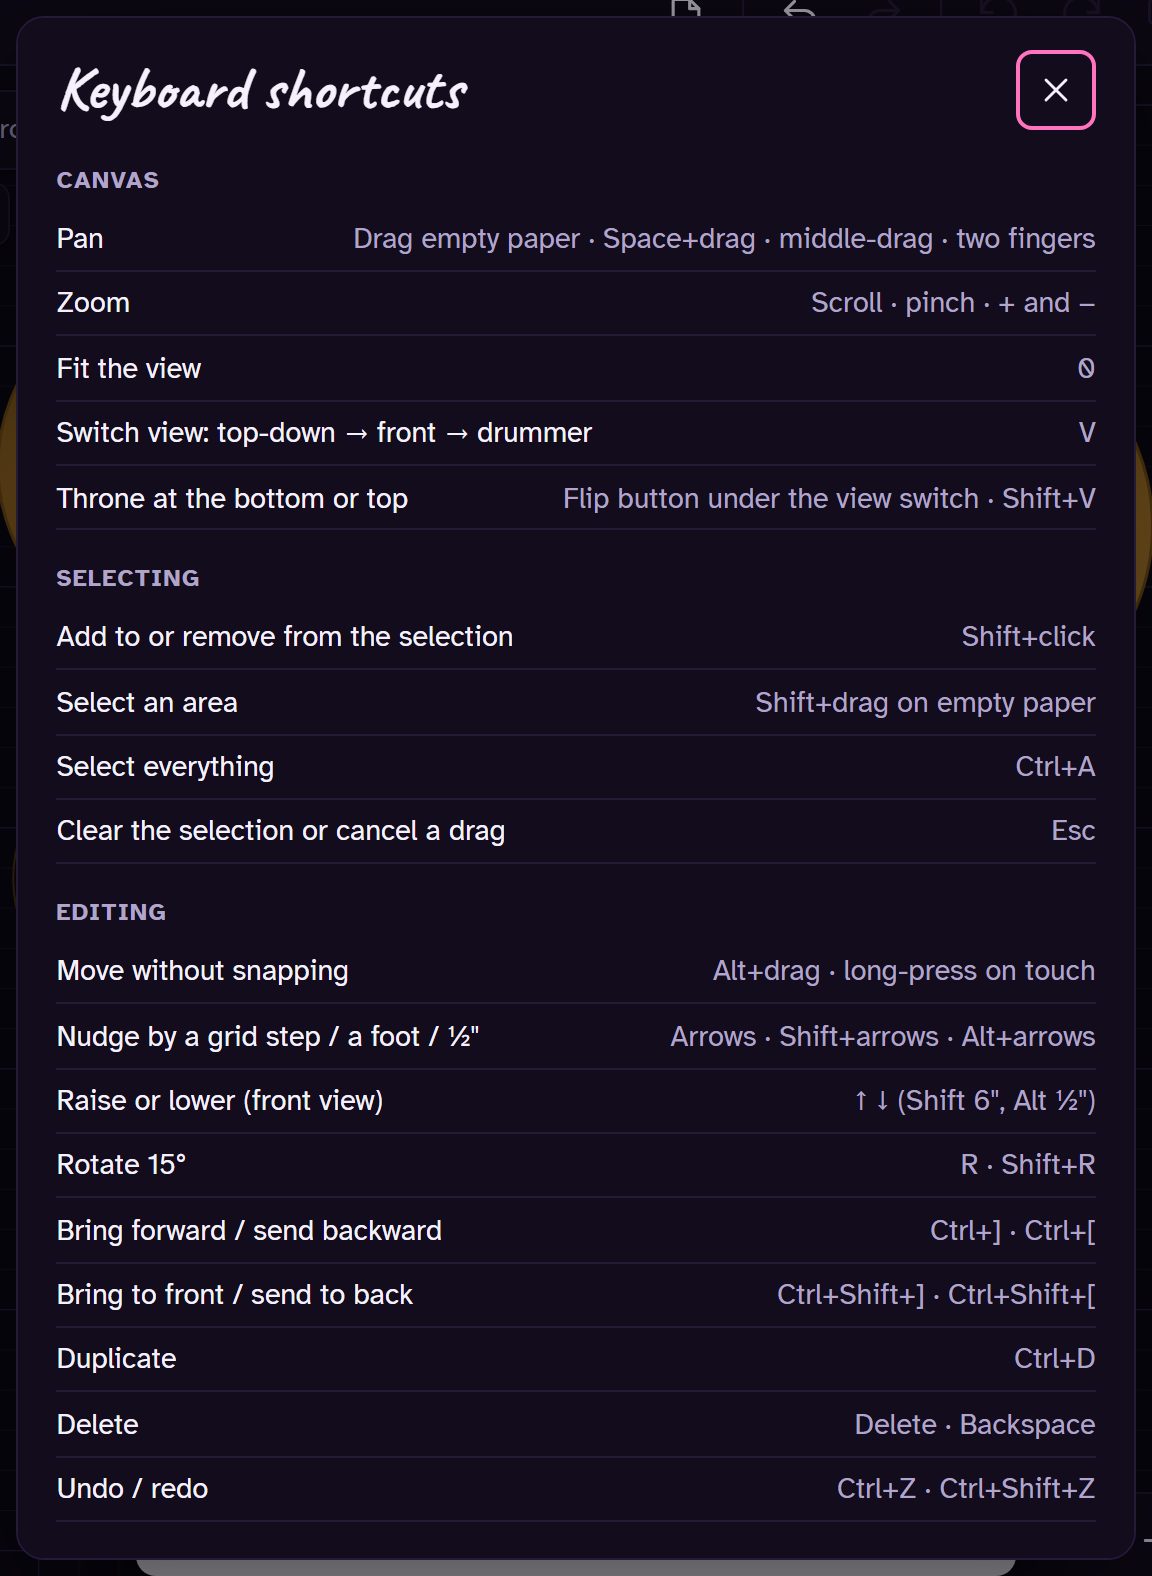
Press ? in the app for the full list.

  1. 19

    The handy ones

    Undo / redo
    Ctrl+Z / Ctrl+Y
    Duplicate
    Ctrl+D
    Delete
    Del
    Rotate
    R / Shift+R
    Select all
    Ctrl+A
    Switch view
    V
    Throne top / bottom
    Shift+V
    Play mode
    P
    Fit the kit
    0
    Save / open
    Ctrl+S / O
    The in-app keyboard shortcuts list.
    The full list, from ?